Setting Up
Setting up an FARMBOX system is like starting a happy farm game, although in the virtual world and effect to the real world. Thankfully it is not as hard as the real farming and you get to do a trial too!
Implementation requires the implementer to take a step back and set aside some time to do this right. This is usually not a couple-of-hours, after-work kind of a farm.
- The Setup Farm

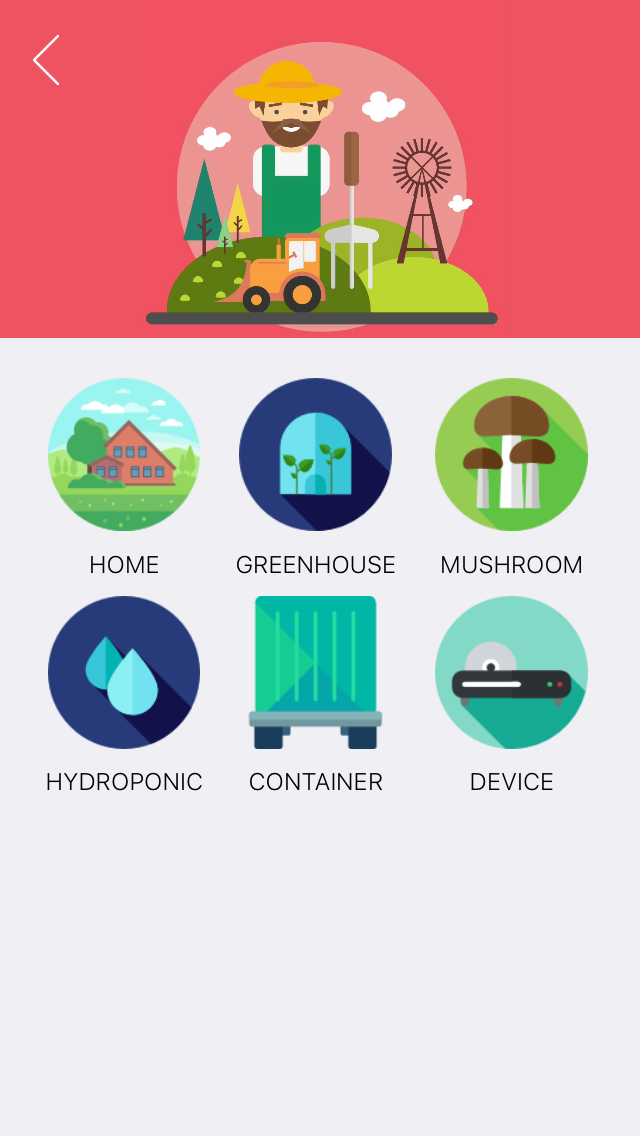
The FARMBOX Apps supports two ways to create a farm
Normal way

Smart way
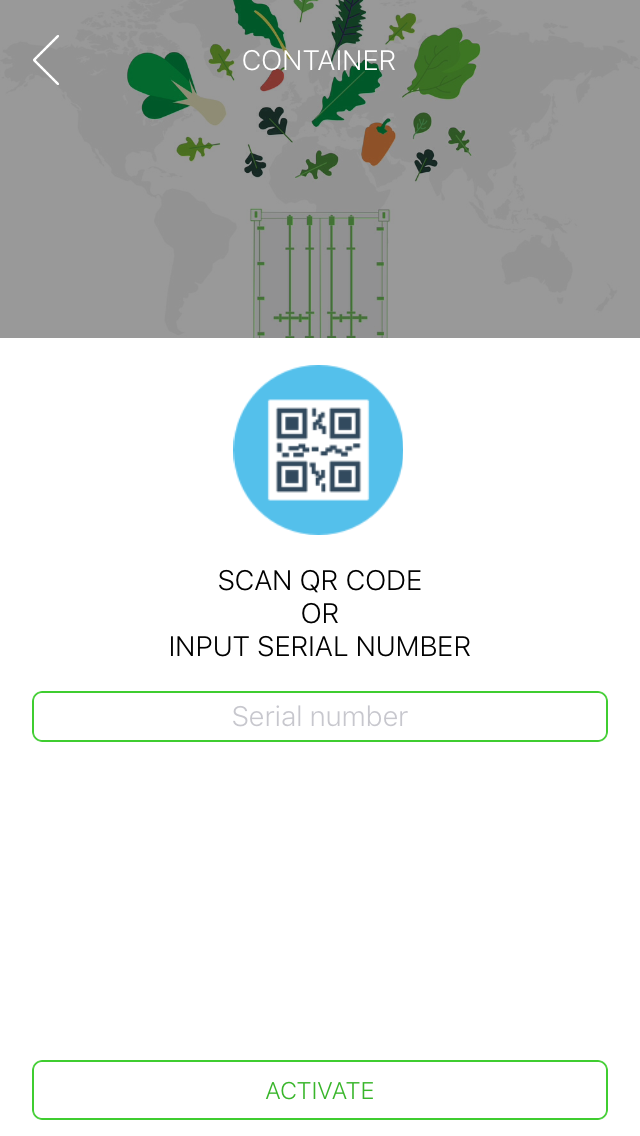
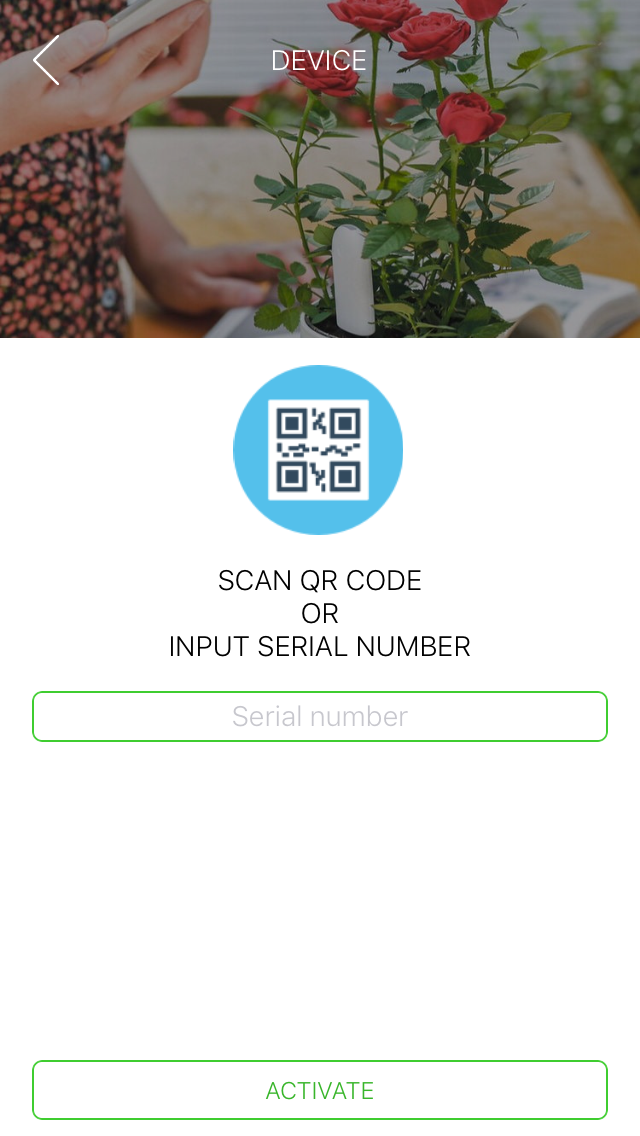
In the full packages, we have a special QR on the warranty card, you can use this QR code to create a new farm by smart way. By using the smart way, you don't need to activate device by device for your farm as normal way.
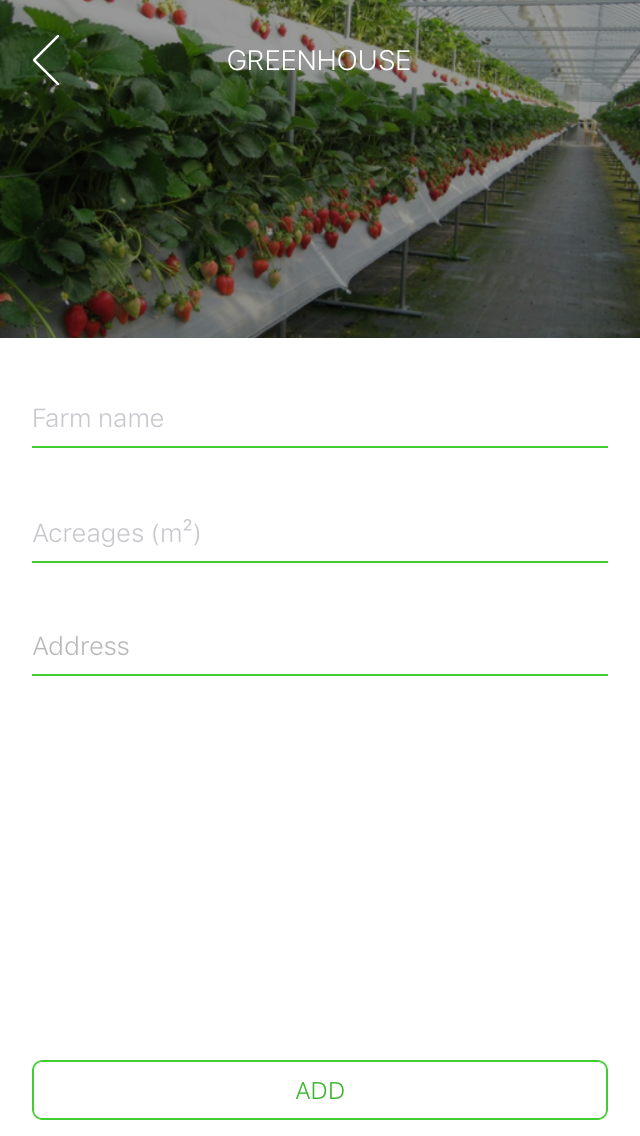
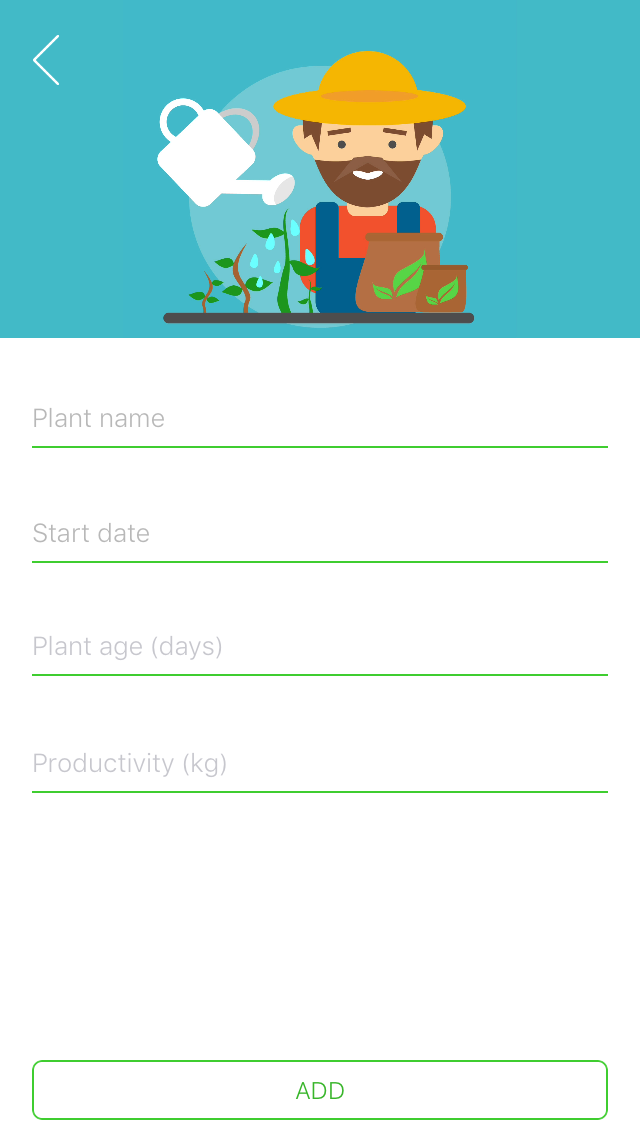
After creating the new farm success, you will be navigated to the setup season page
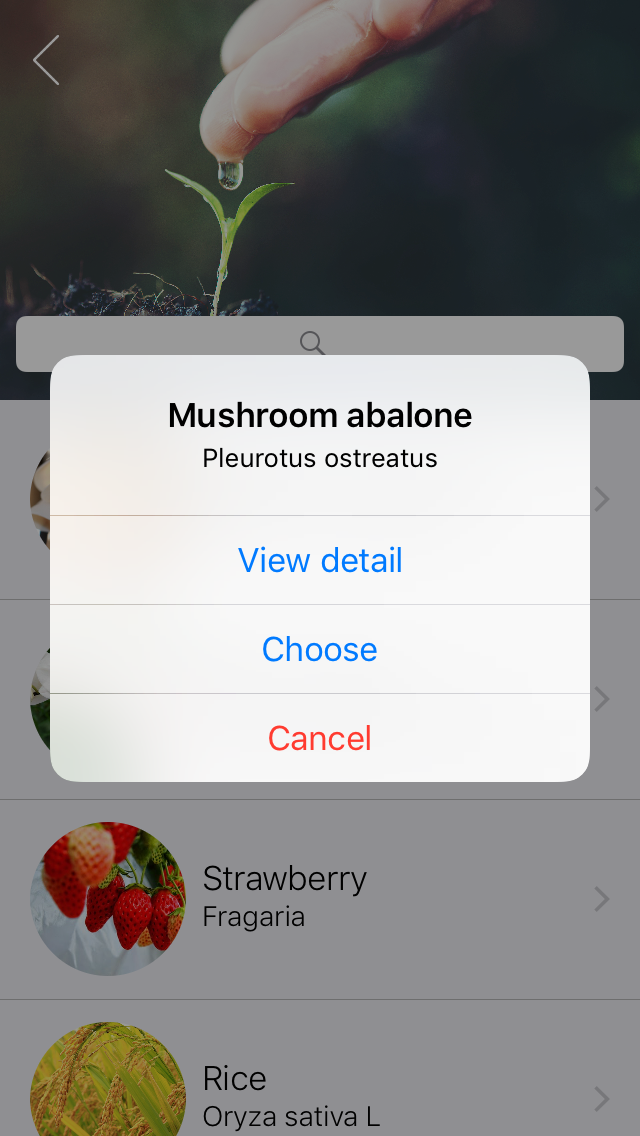
- The Setup Season
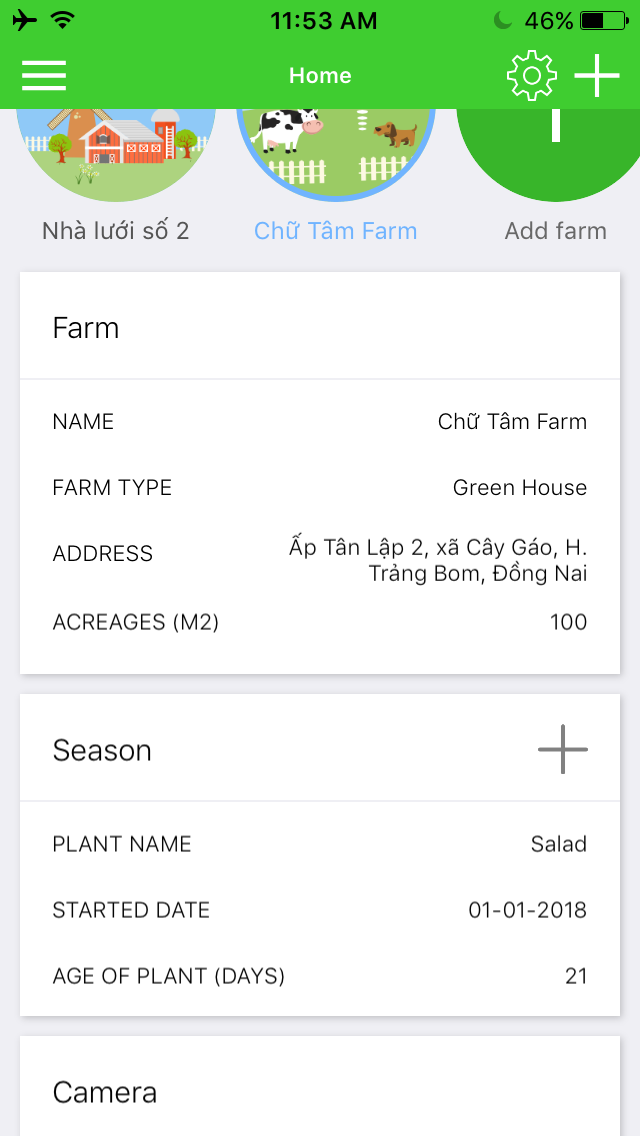


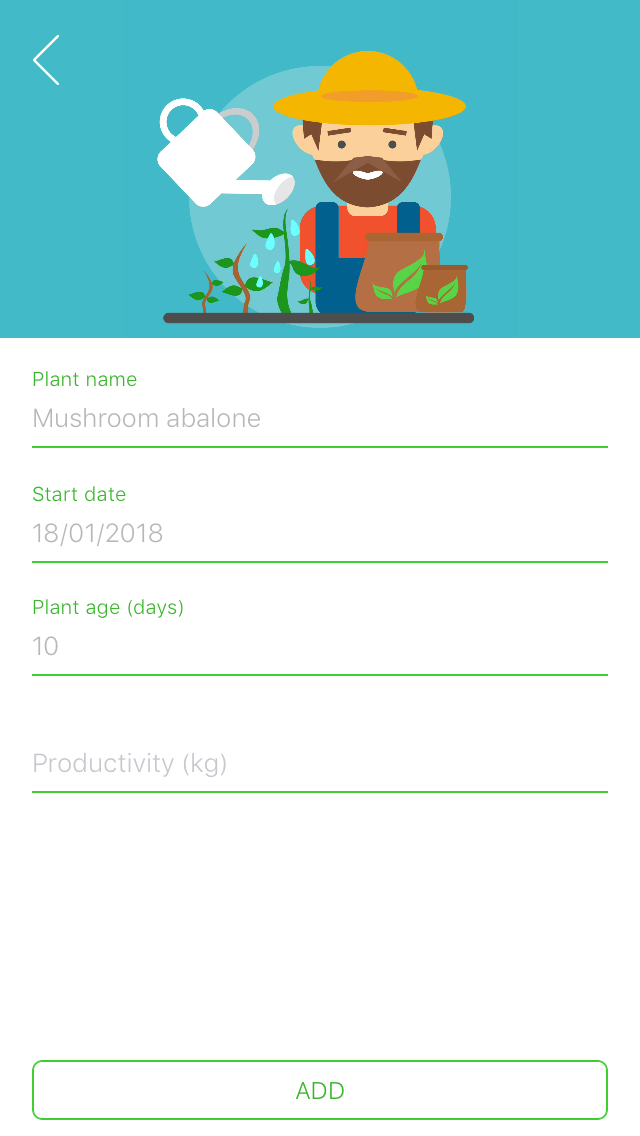
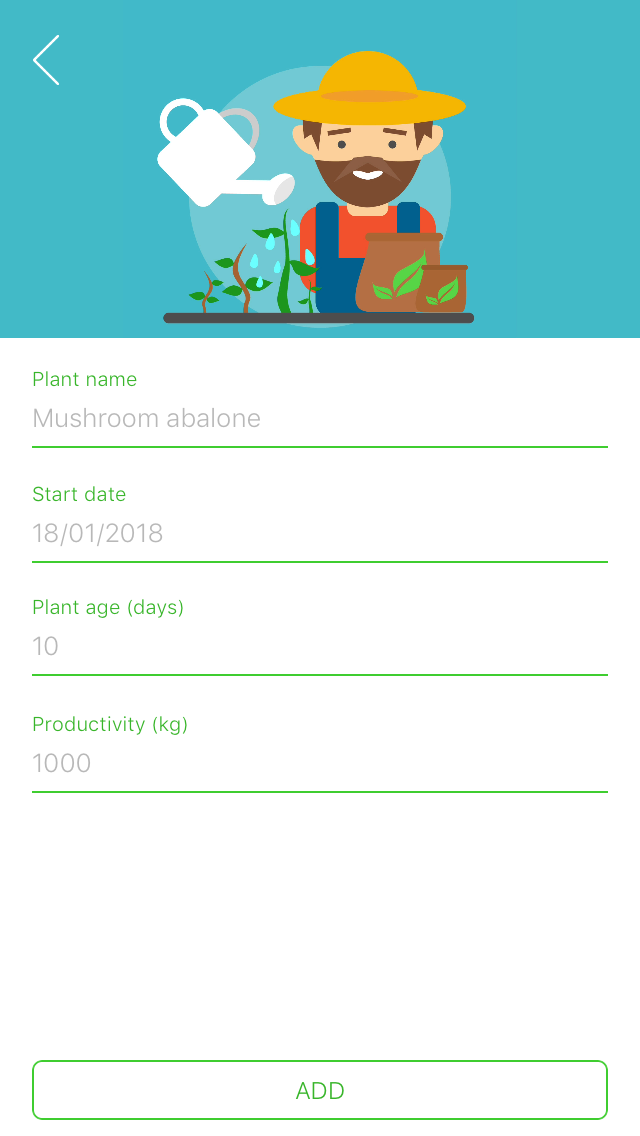
After creating a new season successful, you will be navigated back to dashboard page and the new season information
- The Activate Device
After creating a new farm and new season, you can activate the devices include sensor, smart plug, smart remote, camera for your farm.

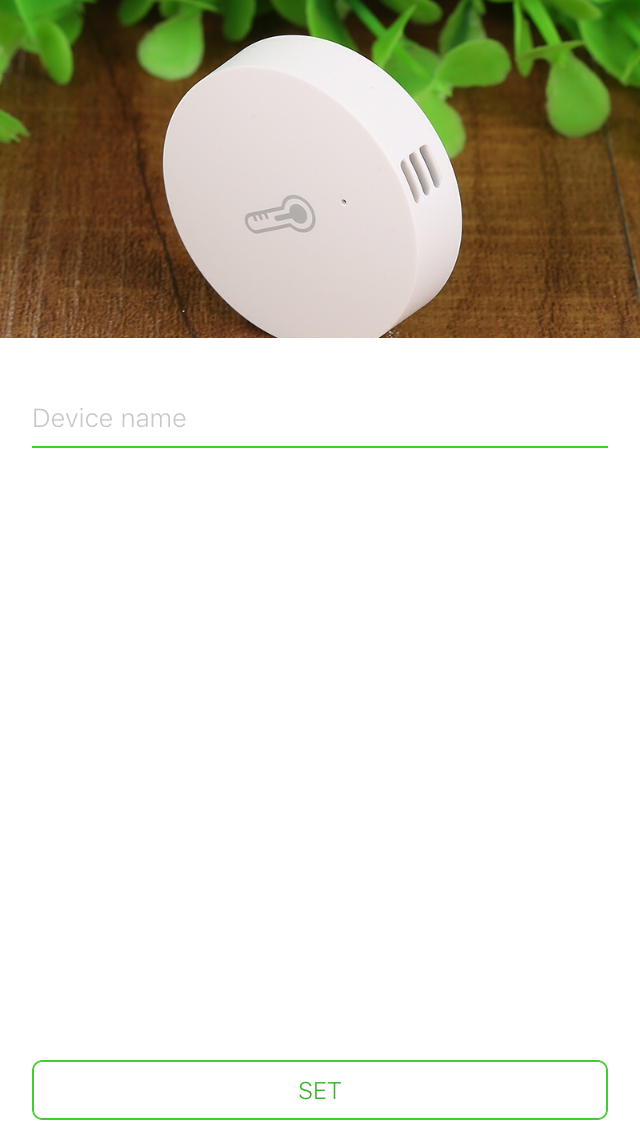
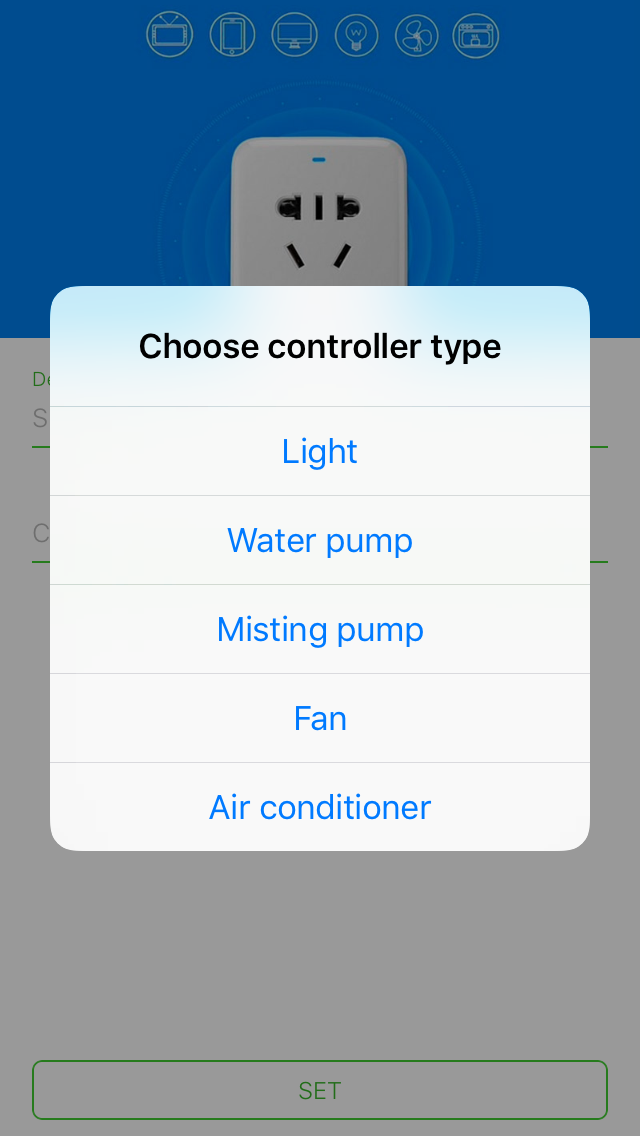
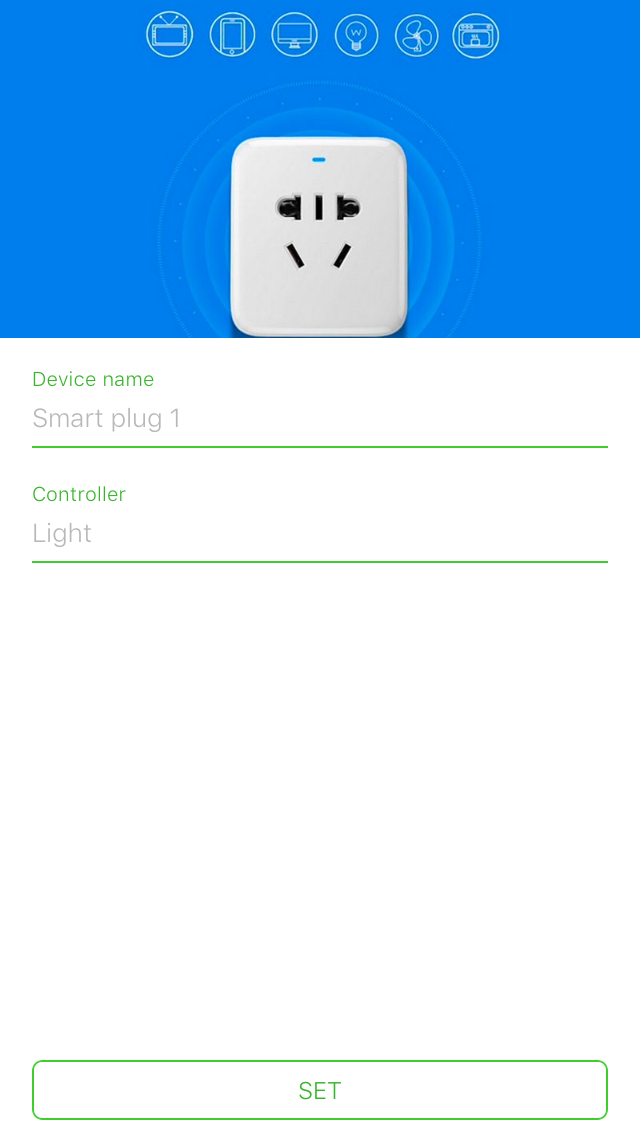
When the device is activated, depend on the kind of your device, you will see one kind of the screen as below to input the device custom name
- The Setup Device
After activating all devices, you will need to setup into your farm. Our hardwares are very simple to setup, just "PLUG", "PLAY" and "GROW". You just need turning on the device and they will auto connect to our gateway.
Soil Sensor
Specification
|
Connection |
BLE 4.0 |
Power |
CR2032 battery |
|
Life time |
Over 1 year for a coin battery |
|
Function |
Monitor your greenhouse about light, air temperature, soil moisture and soil nutrient |
|
Light |
0 lux - 100,000 lux |
|
Air temperature |
-10°C - 50°C |
|
Soil moisture |
0% - 100% |
|
Soil nutrient |
0 - 20,000 ppm |
|
Waterproof |
IP5 |
|
Brand |
Xiaomi |
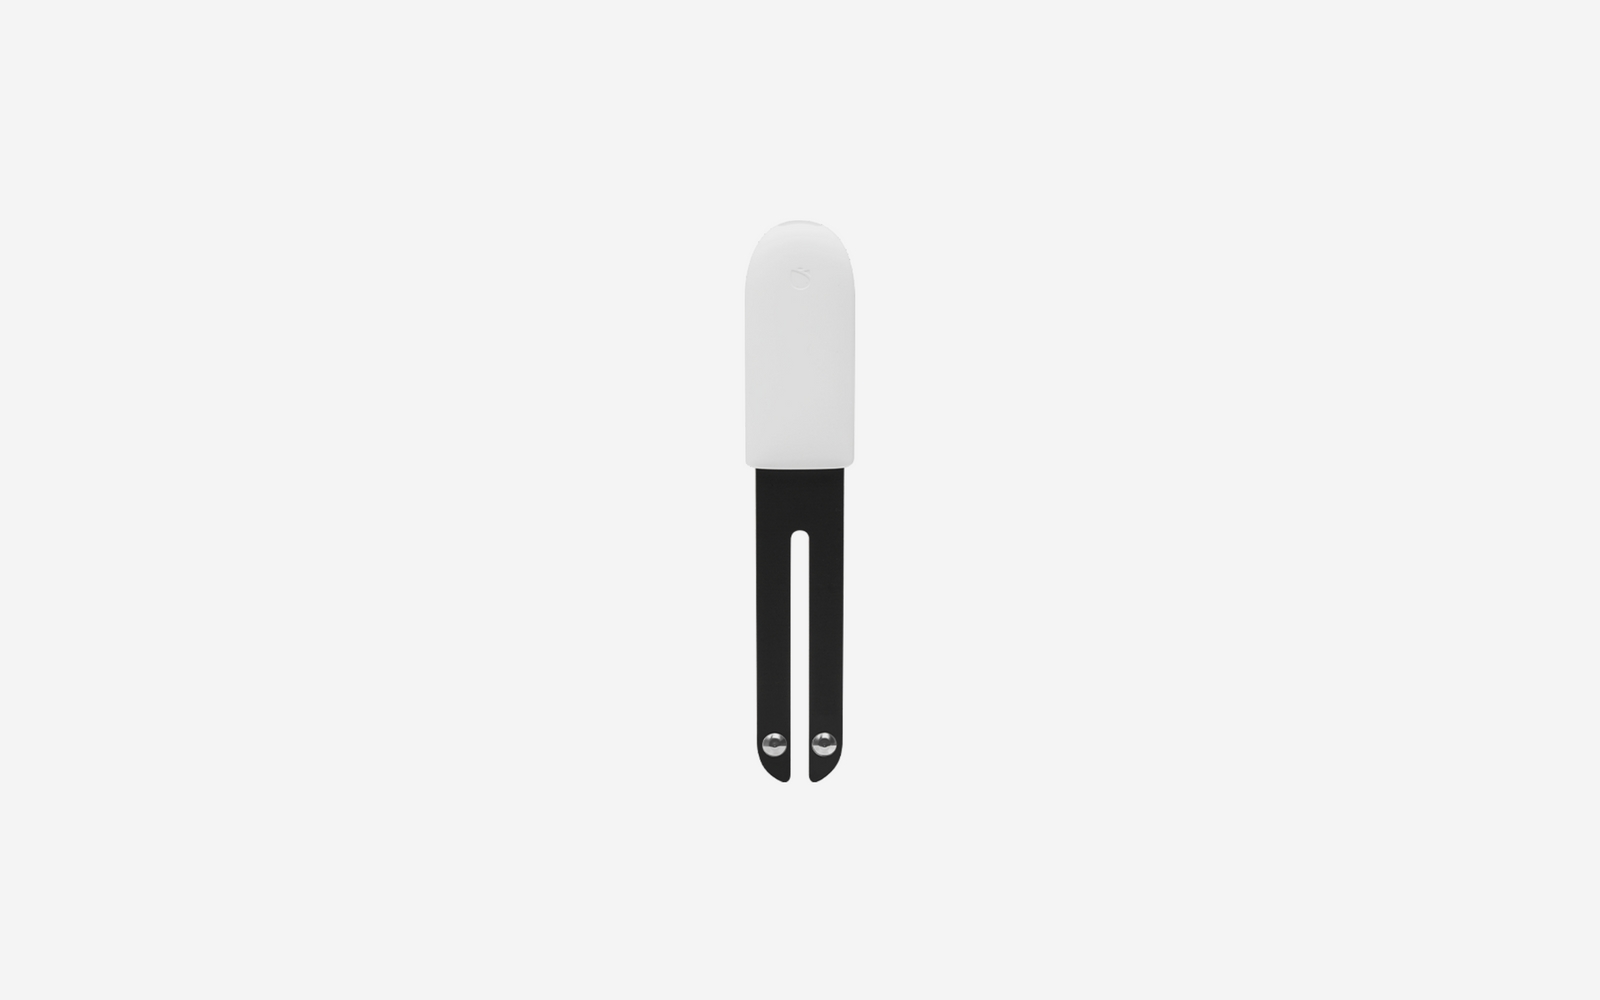
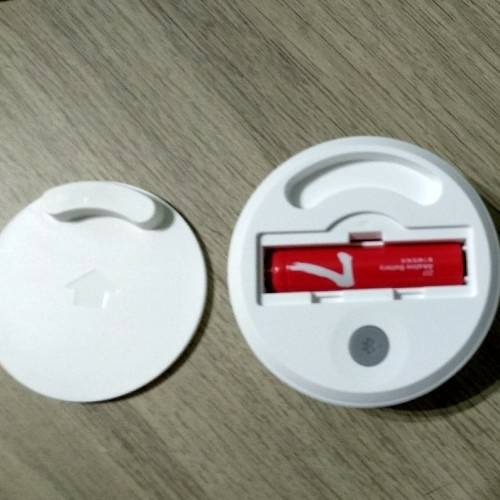
Setting up
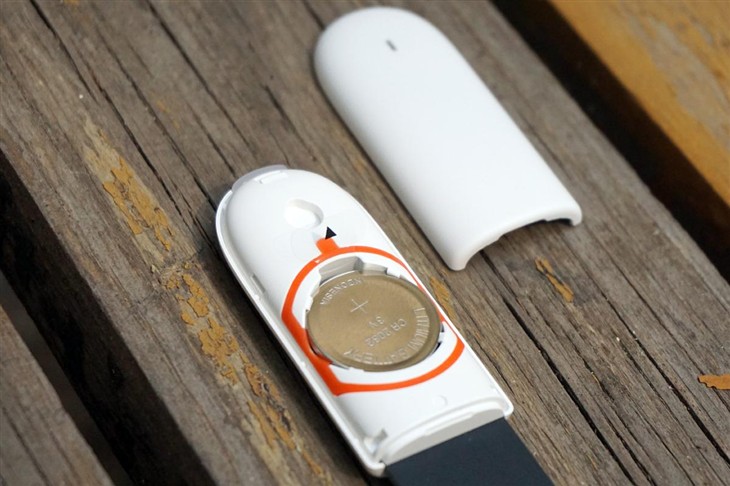
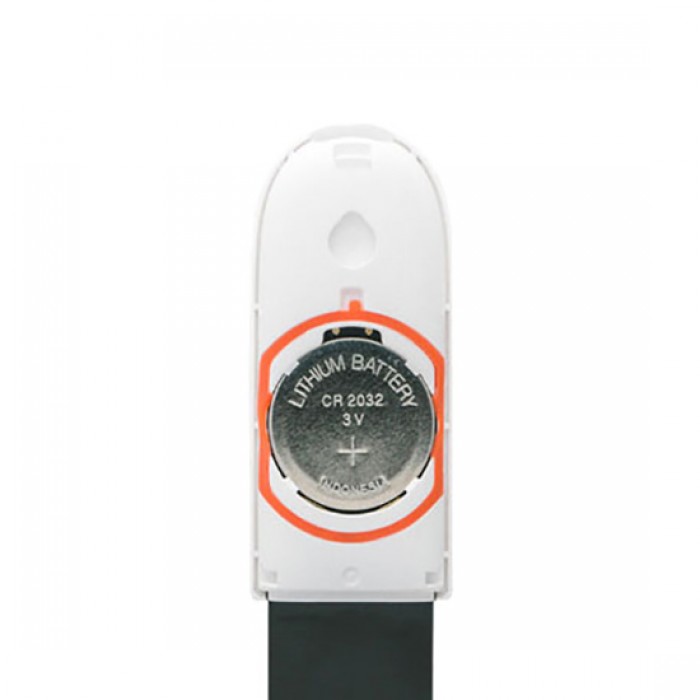
Open the back cover of sensor, you will see the CR2032 battery, the transparent plastic cover and the orange rubber |
The soil sensor is protected by the orange rubber and It has waterproof IP5 standard. The battery is protected by the transparent plastic cover. To turn on the sensor, you just need to remove the plastic cover. |
|
Close the back cover to begin using |
Finally, plug the soil sensor into the plant pot and done |
|


Notes: The gateway and the soil sensor communicate via BLE 2.4Ghz. To ensure the connectivity performance, the face of soil sensor must face to the gateway.
Air Sensor
Specification
|
Connection |
BLE 4.0 |
Power |
CR2450 battery |
|
Life time |
Over 2 year for a coin battery |
|
Function |
Monitor air temperature and air humidity of your mushroom |
|
Air temperature |
-10°C - 50°C |
|
Air humidity |
0% - 99% |
|
Waterproof |
IP5 |
|
Brand |
Axaet |
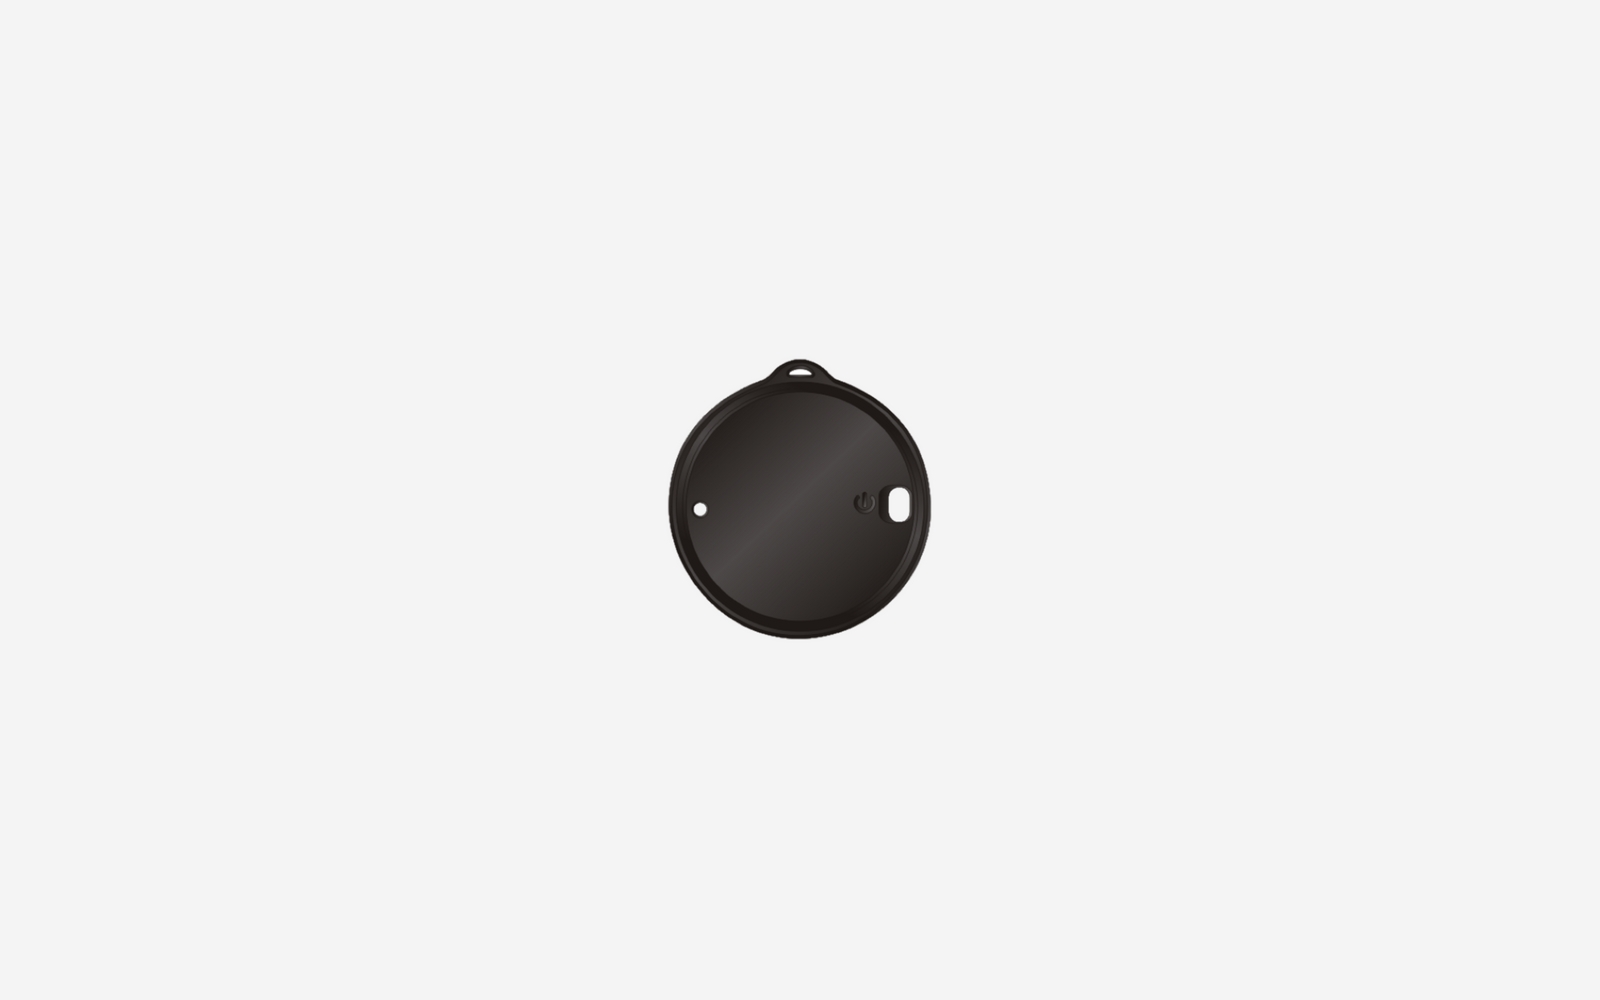
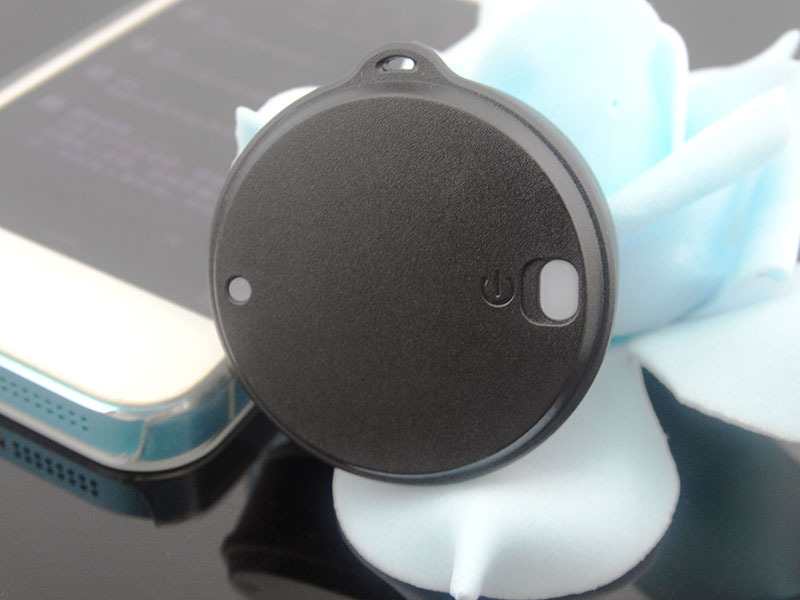
Setting up
Bottom of the air sensor is the power button and the LED indicator |
To turn on or off the sensor, you just need to press and hold the power button until the LED is changed color. The LED has 2 colors: RED - turn off and GREEN - turn on |
|
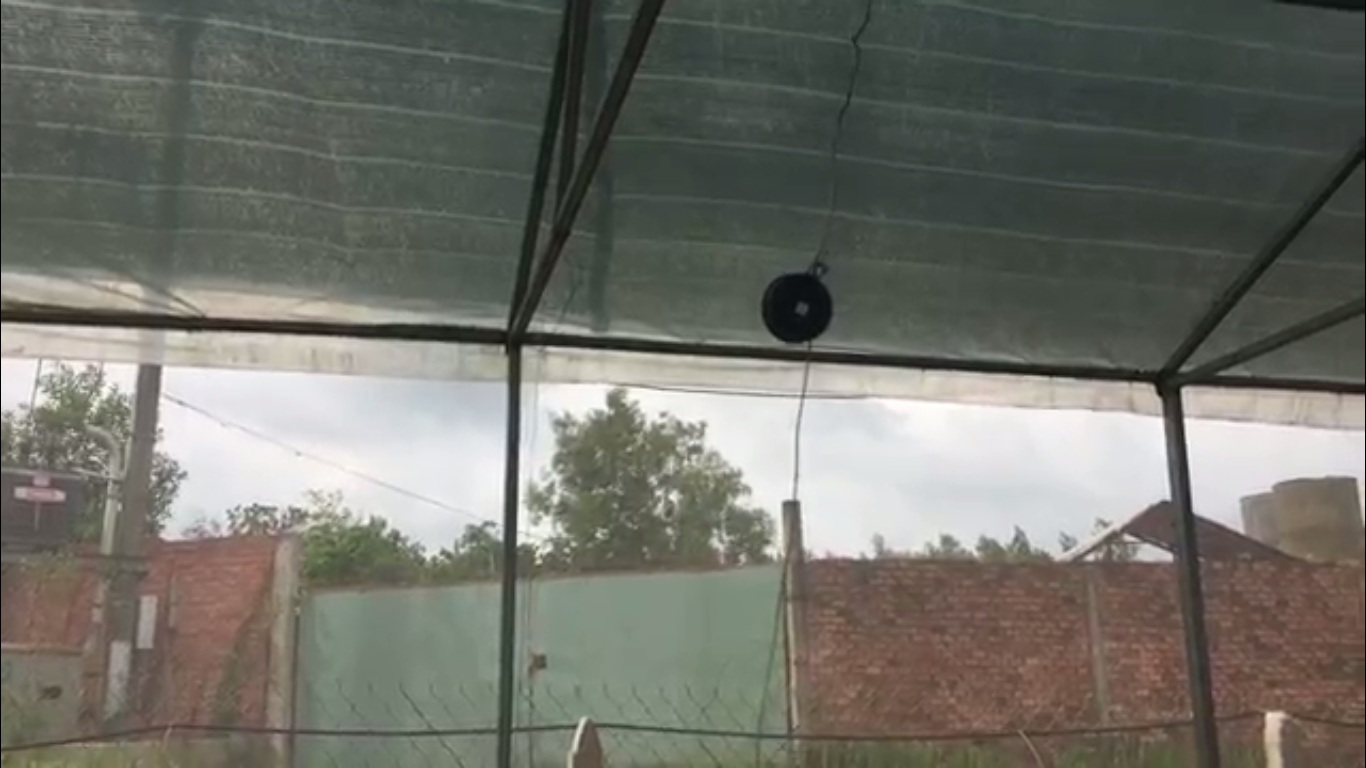
Put the sensor to any place you want to measure |
||

Air Sensor Pro
Specification
|
Connection |
BLE 4.0 |
Power |
AAA battery |
|
Screen |
Black LCD |
|
Life time |
Over 1 year for a coin battery |
|
Function |
Monitor air temperature and air humidity of your mushroom |
|
Air temperature |
-10°C - 50°C |
|
Air humidity |
0% - 99% |
|
Brand |
Xiaomi |
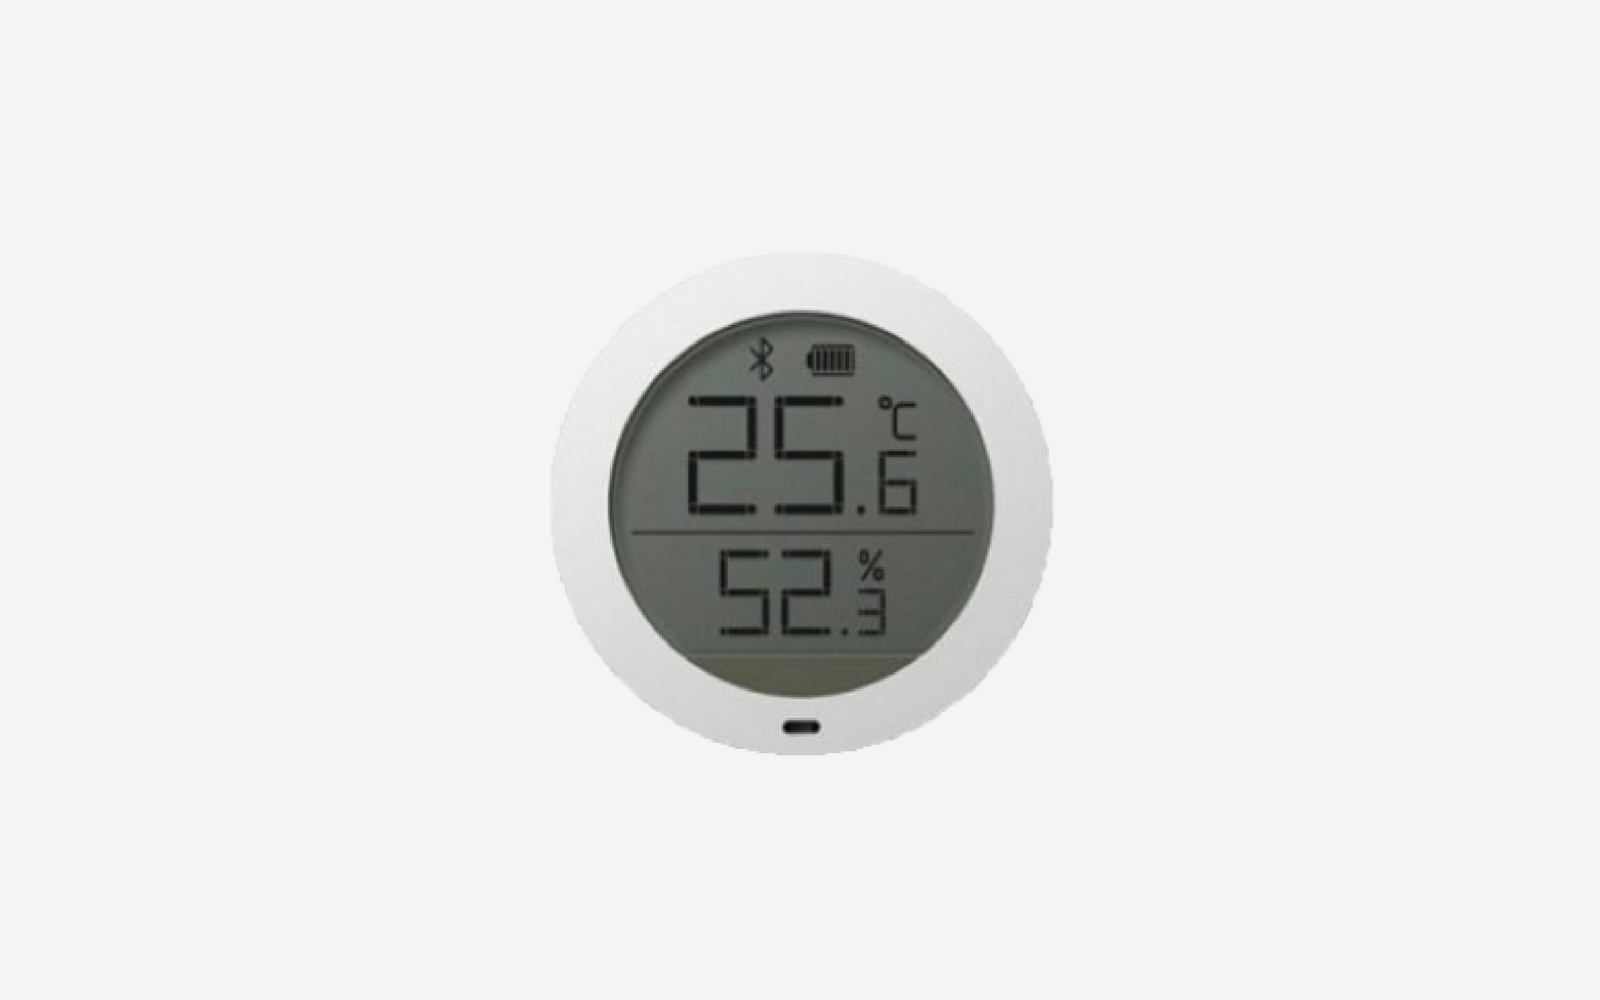
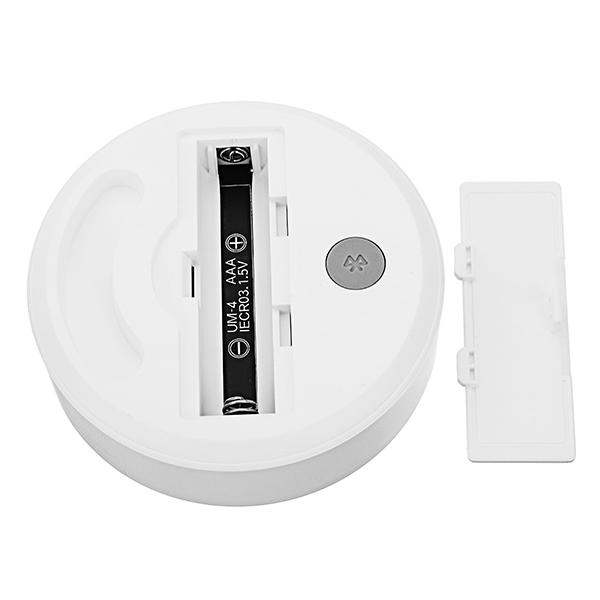
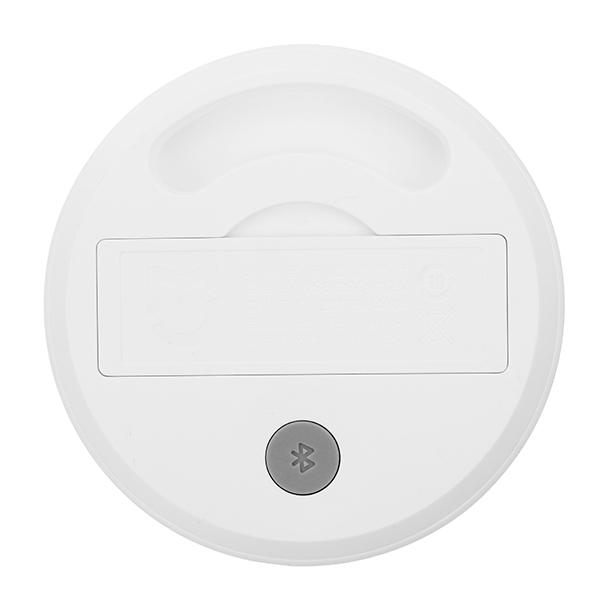
Setting up
Open the back cover to insert the AAA battery |
Insert the AAA battery |
|
Close the back cover to begin using |
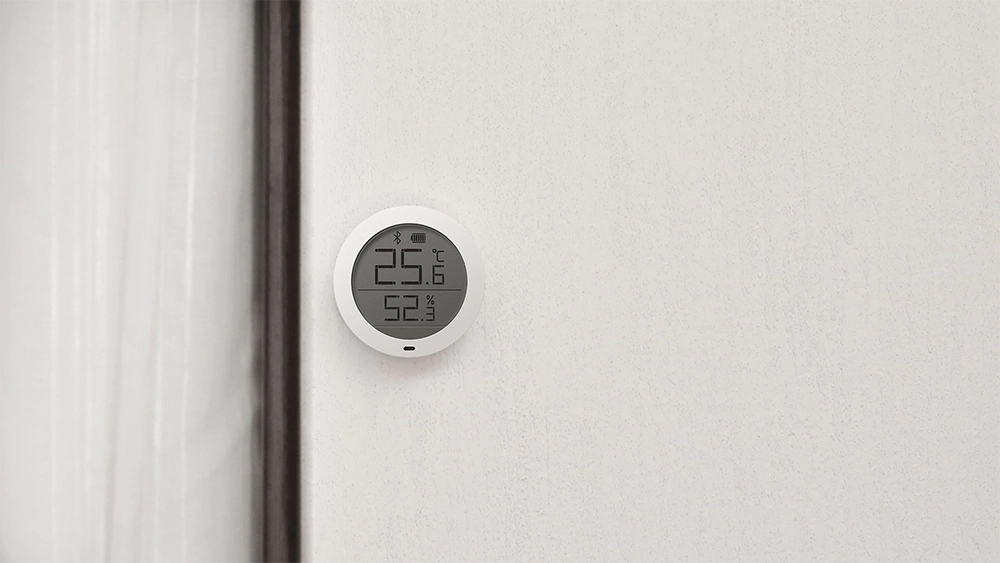
Put the sensor to any place you want to measure |
|
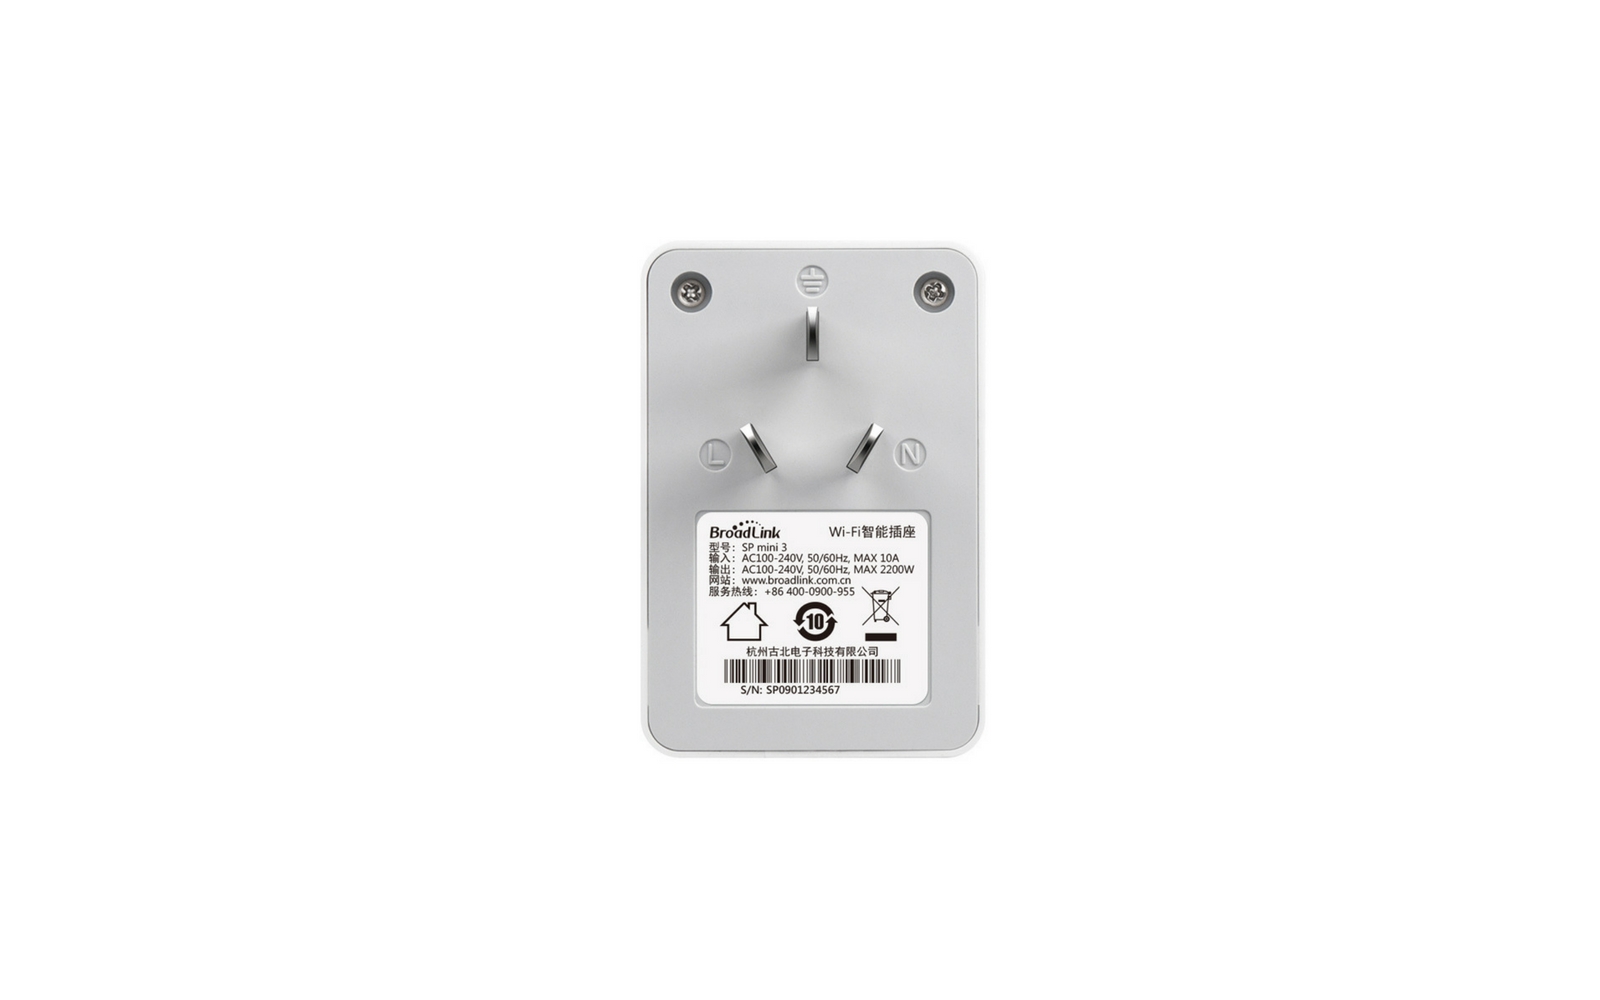
Smart Plug
Specification
|
Connection |
WiFi 2.4GHz |
Power |
110 - 240VAC |
|
Load |
2500W |
|
Life time |
500,000 times on, off |
|
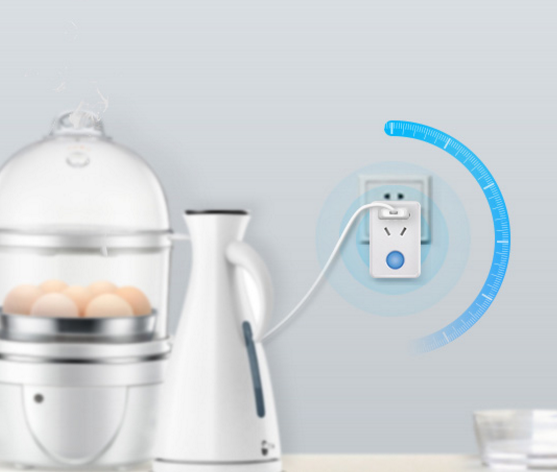
Function |
Remote turn on or off the device such as lamp, pump, fan, humidifier |
|
State |
On or Off |
|
Working |
0% - 80% |
|
Brand |
Broadlink |
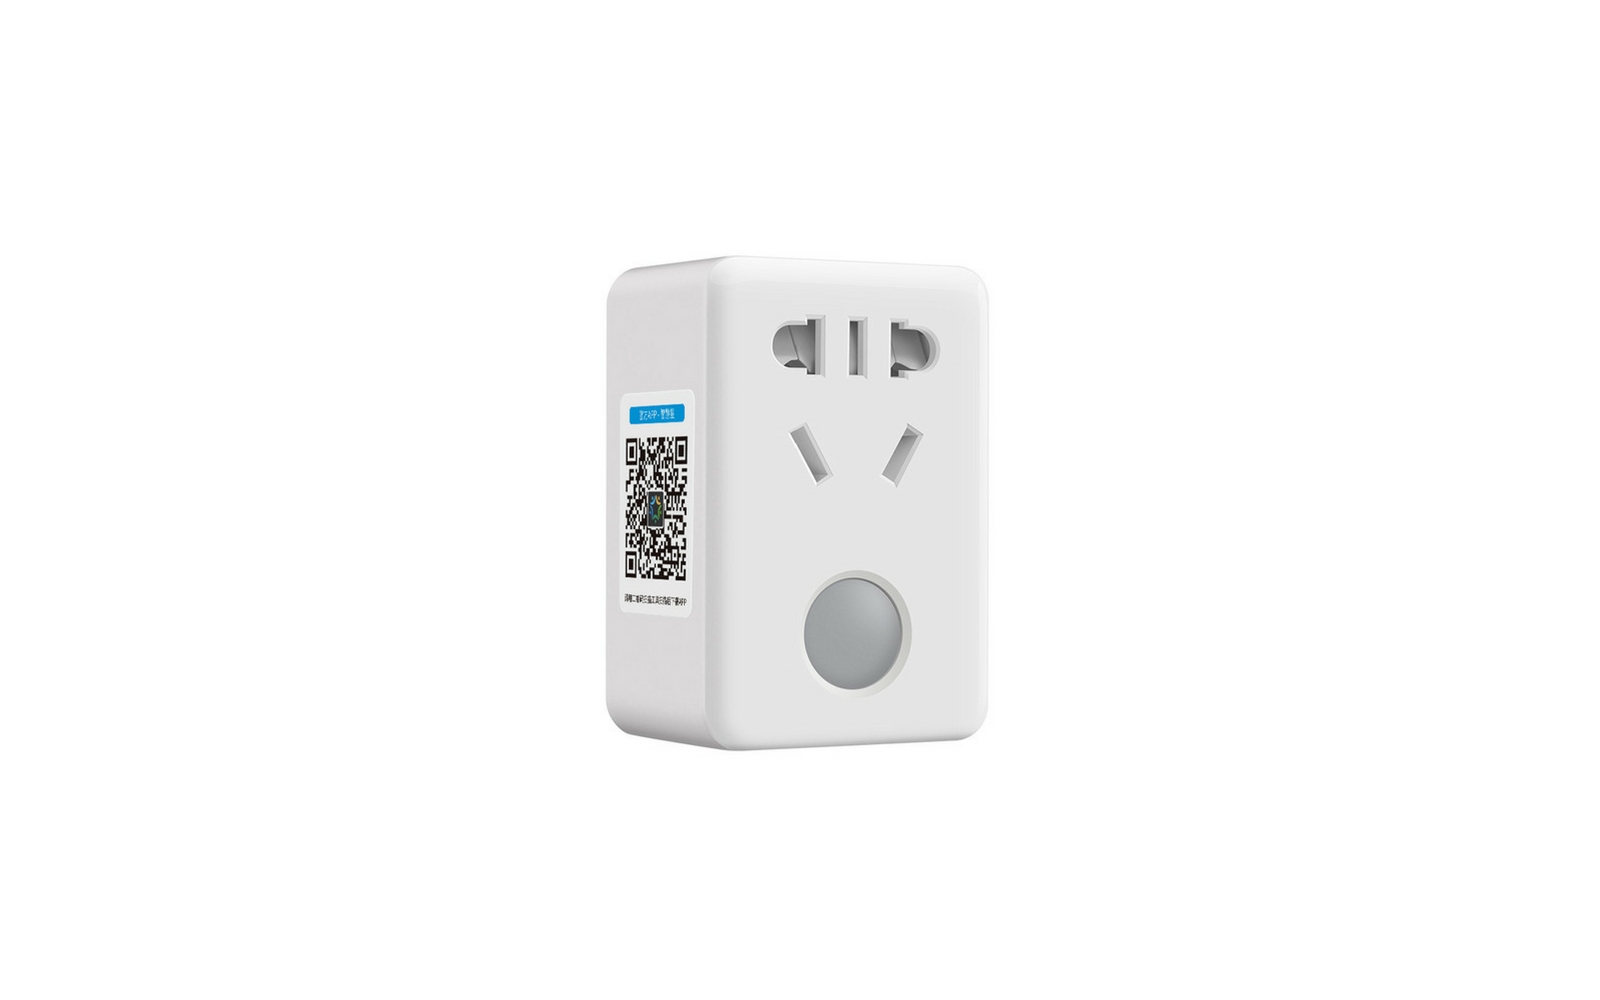
Setting up
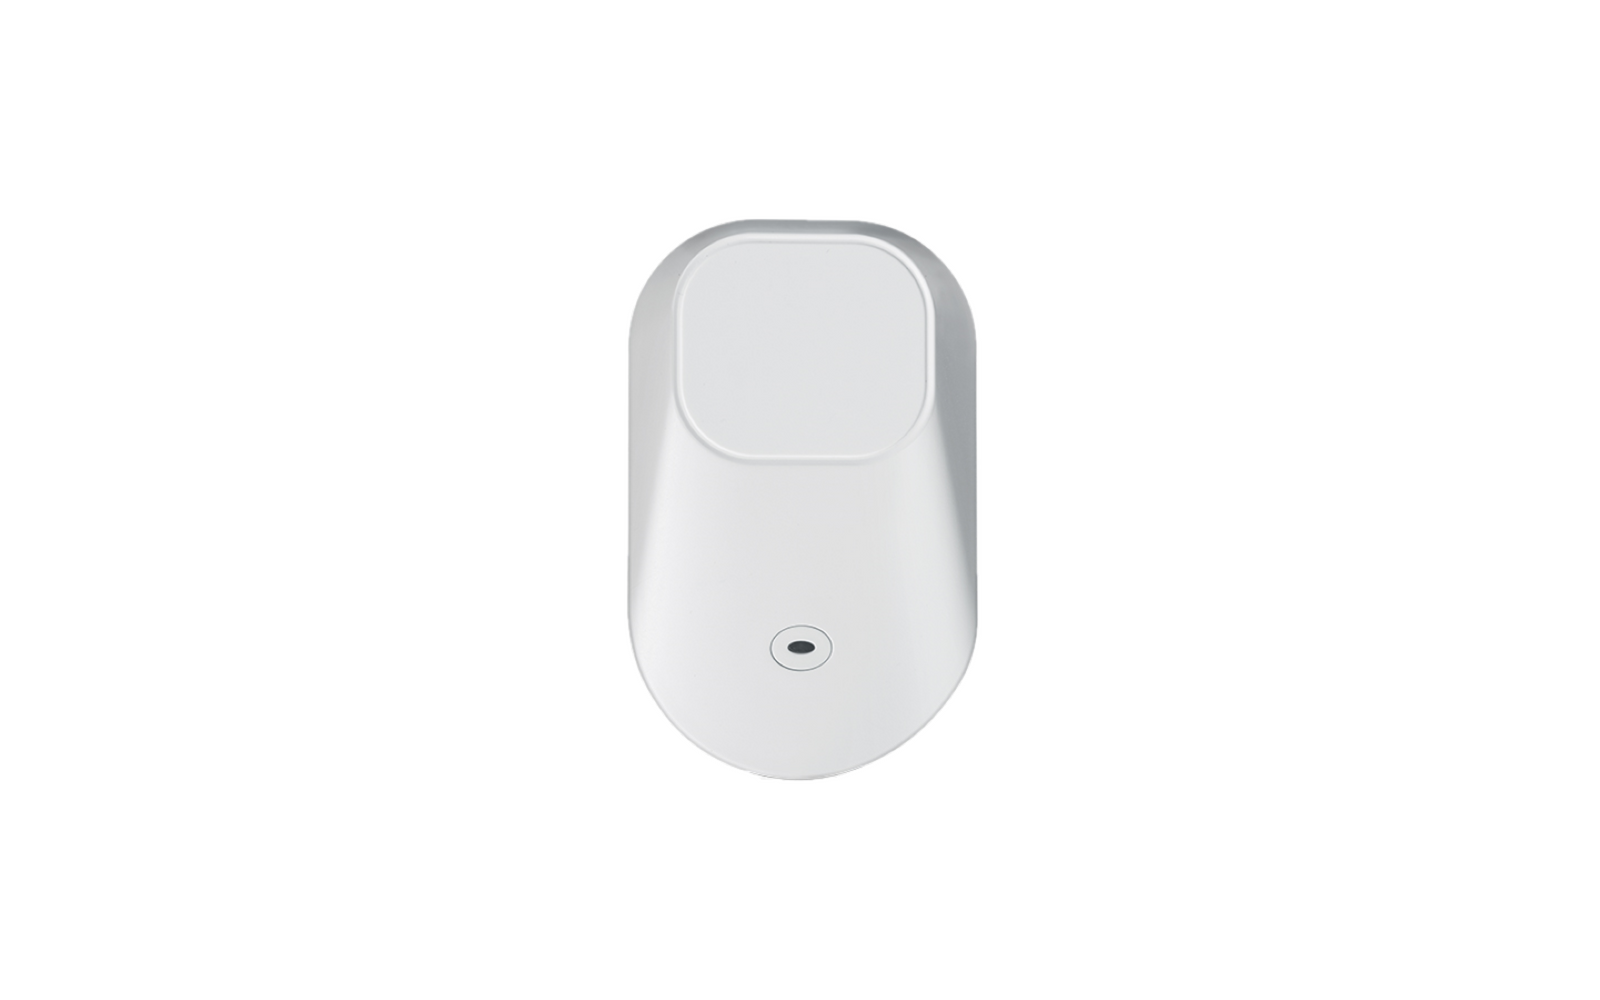
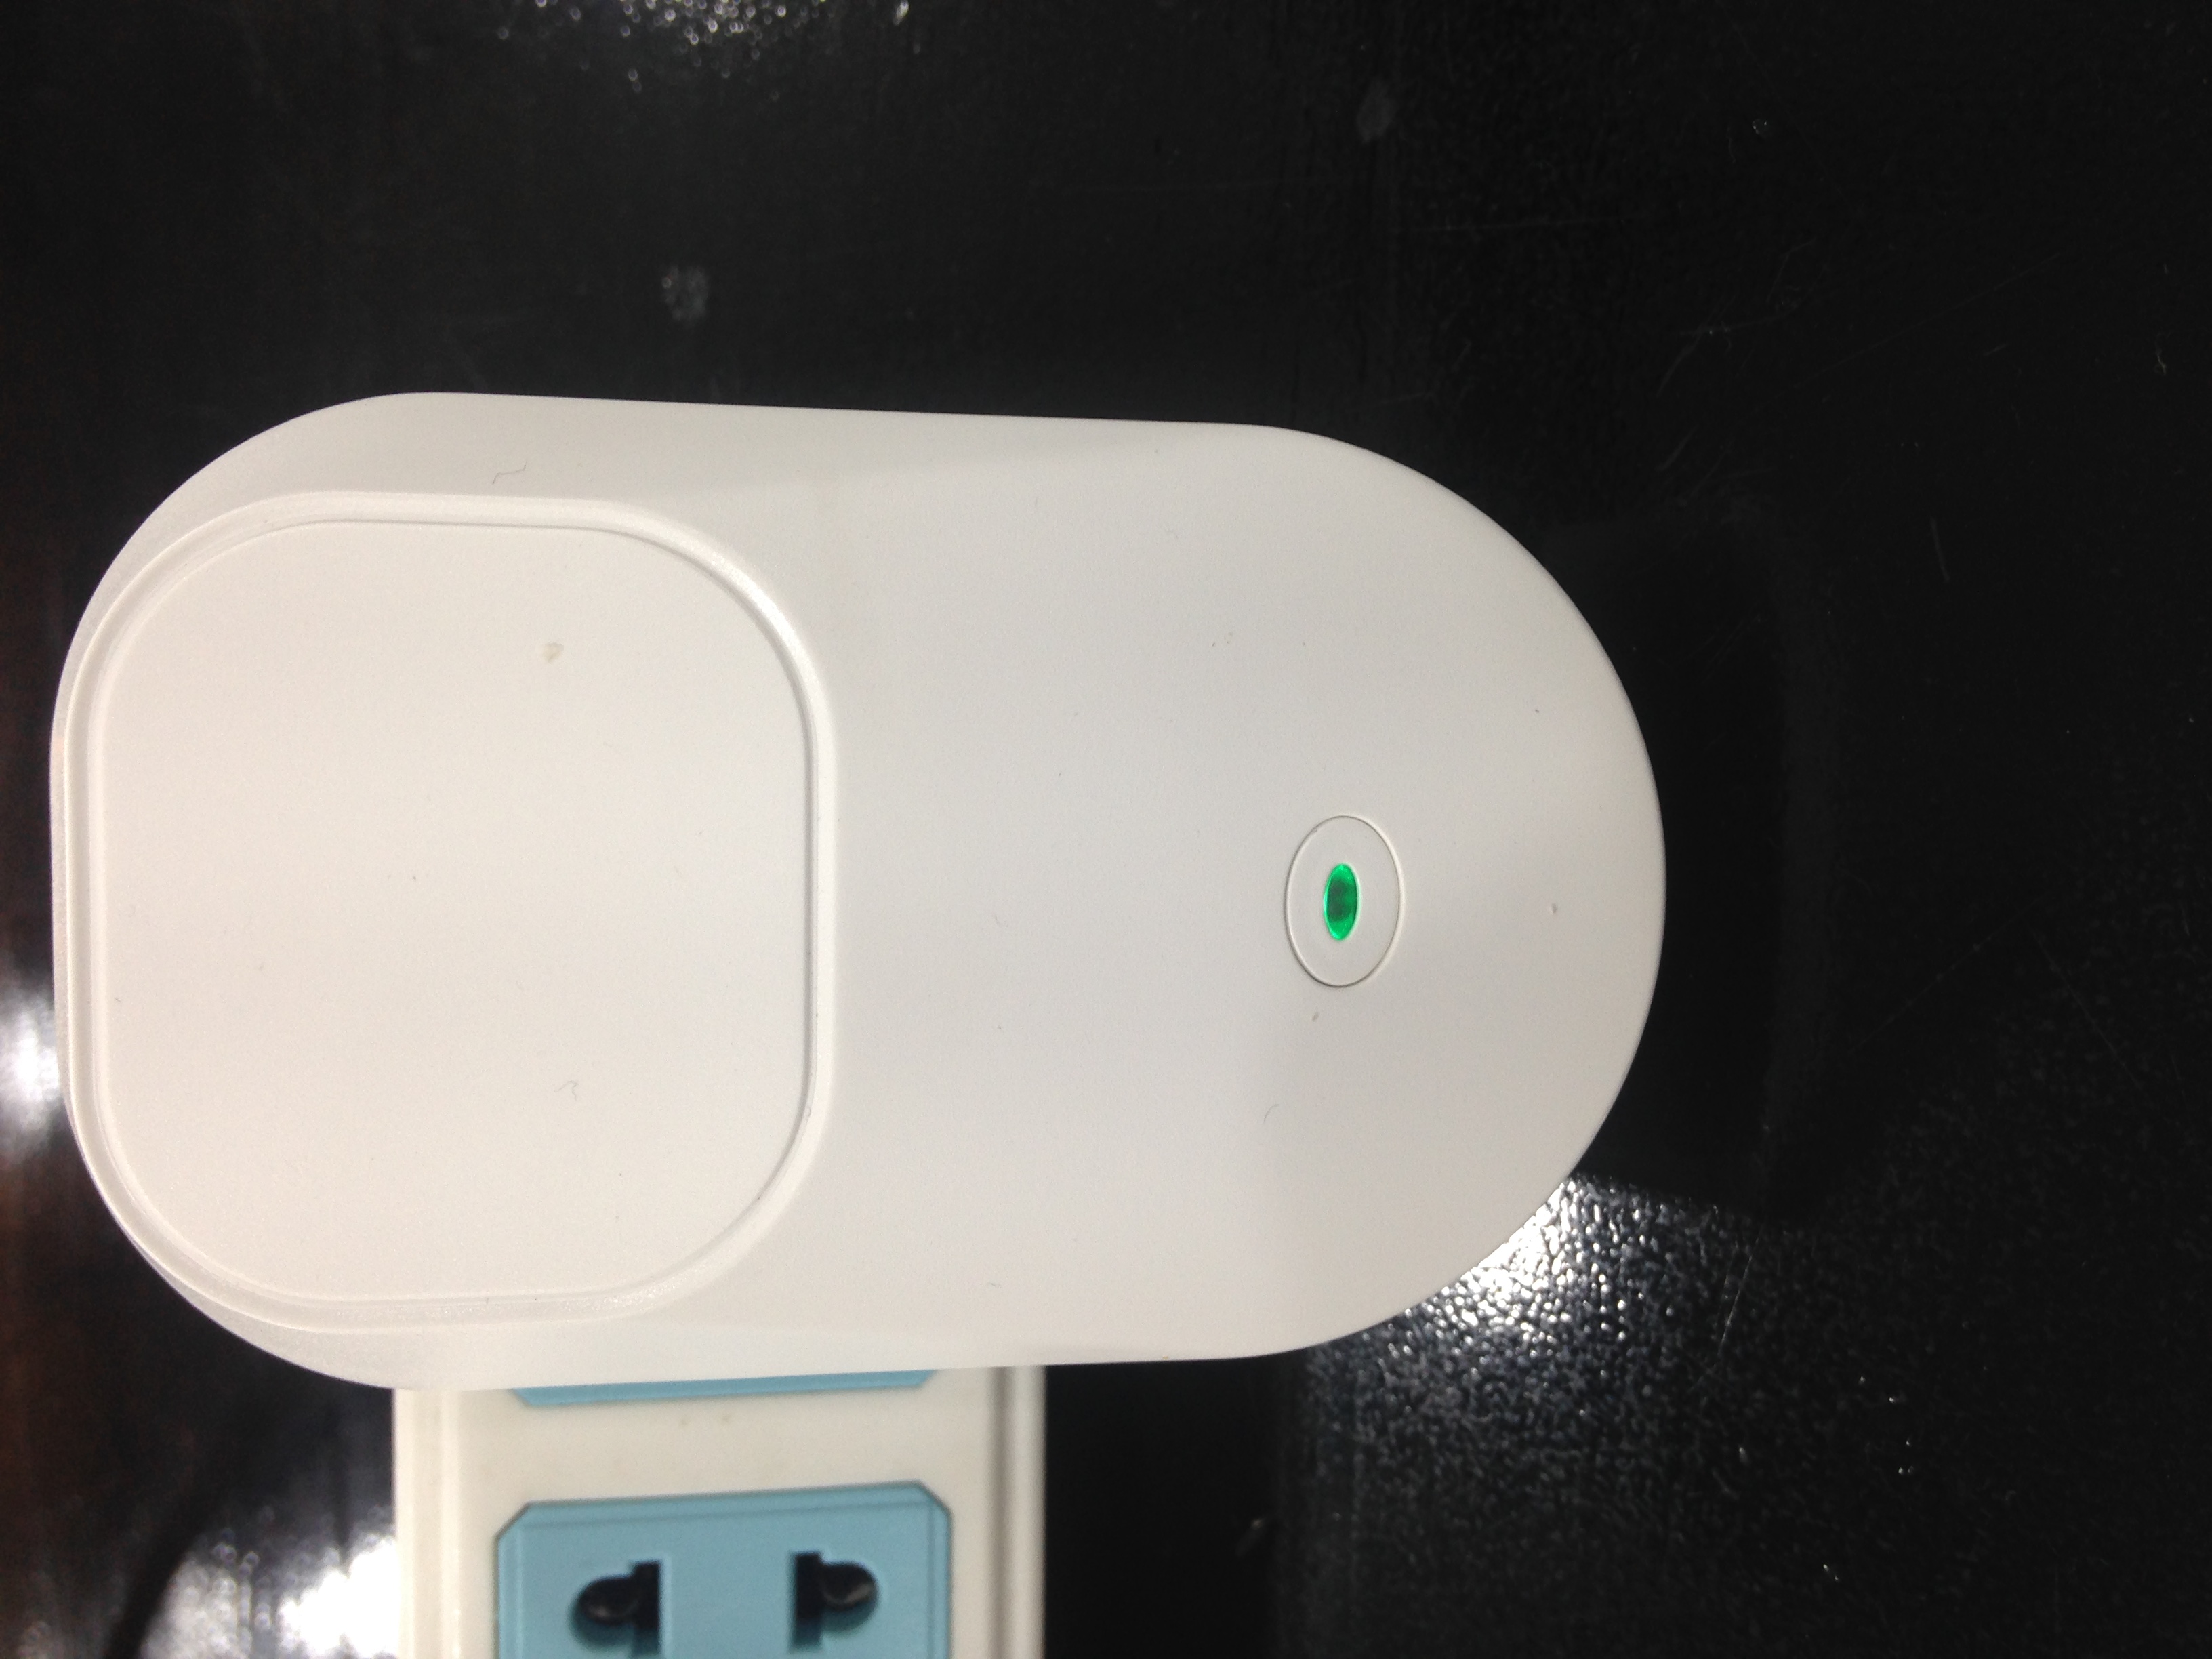
The smart plug supports the CN plug type as default. Depend on your country, you must use an adapter to convert the CN plug to other plug such US, EU, UK, AU... |
Plug the smart plug into your socket to power the smart plug |
|
Finally, plug your device wants to control to the smart plug. |
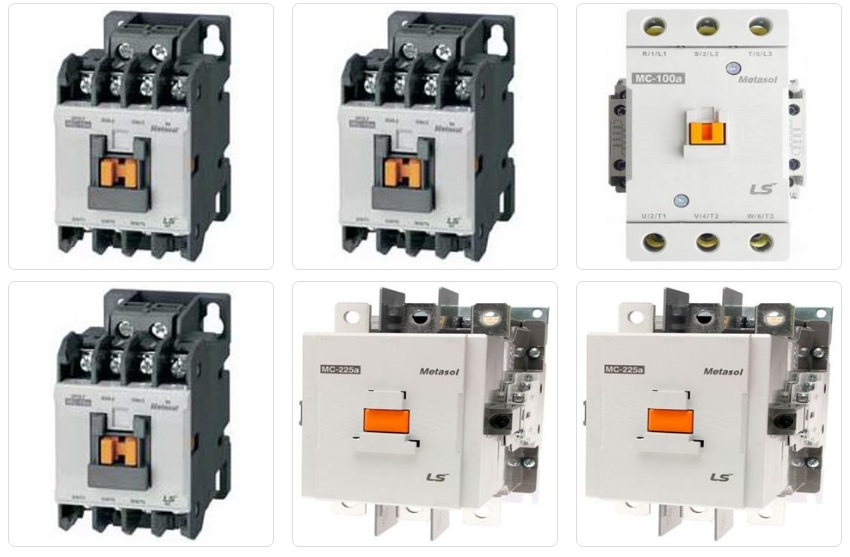
For the high load device (>10A), you must use a contactor and the smart plug will control the contactor |
|
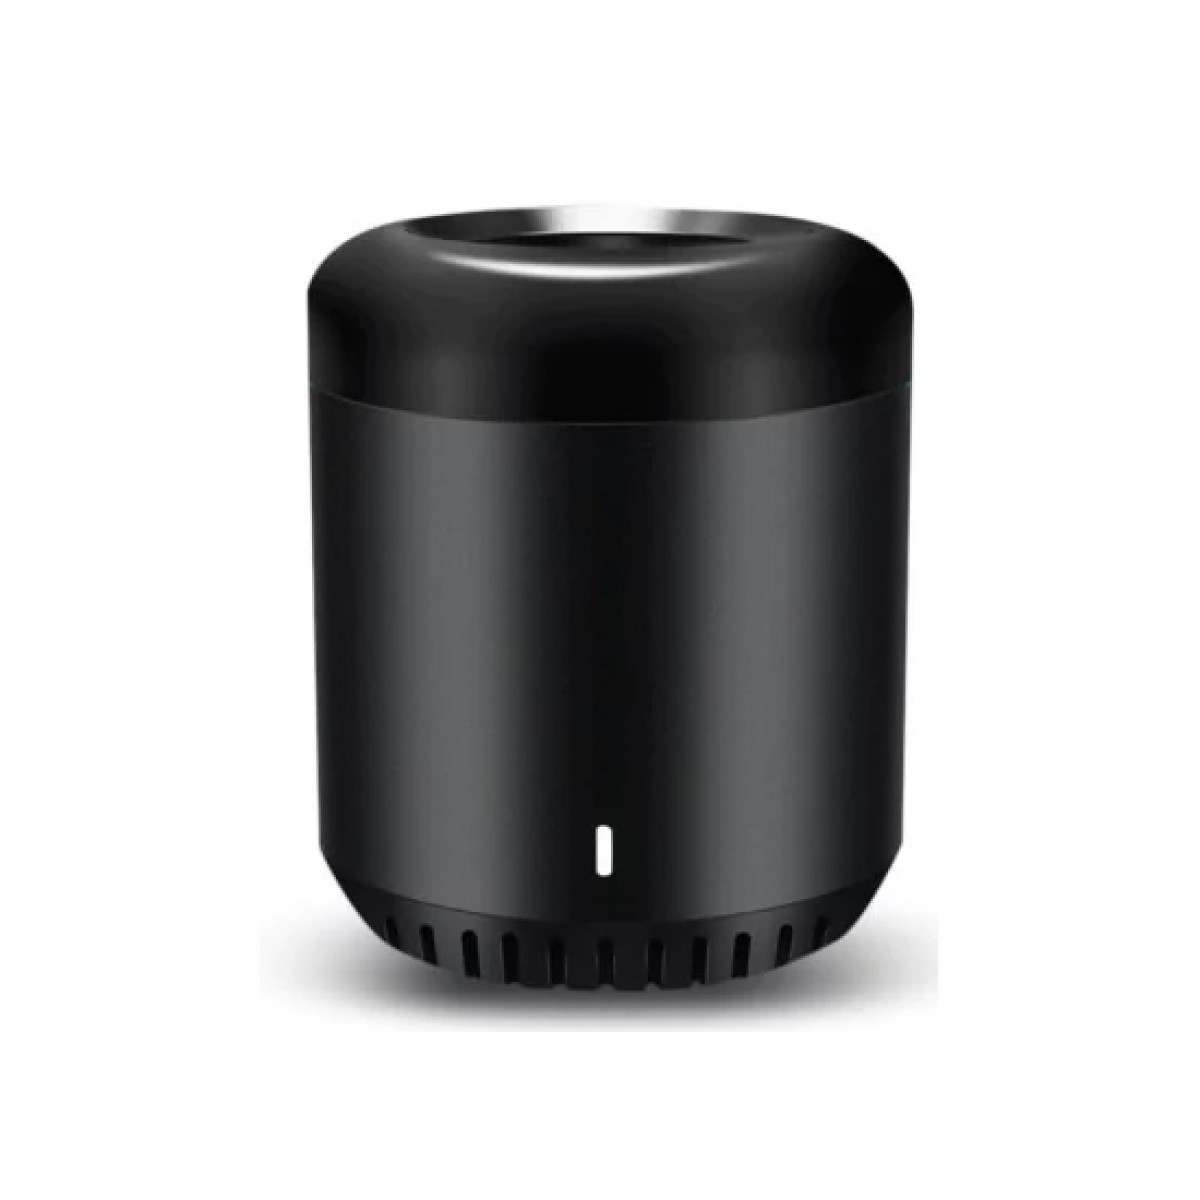
Smart Remote
Specification
|
Connection |
WiFi 2.4GHz |
Power |
5V - 500mAh |
|
Infrared frequency |
38K |
|
Infrared direction |
360° |
|
Life time |
Over 10 years |
|
Function |
Remote control the device, which supports IR such as air conditioner, curtain, fan, RGB LED |
|
Working |
0% - 80% |
|
Brand |
Broadlink |
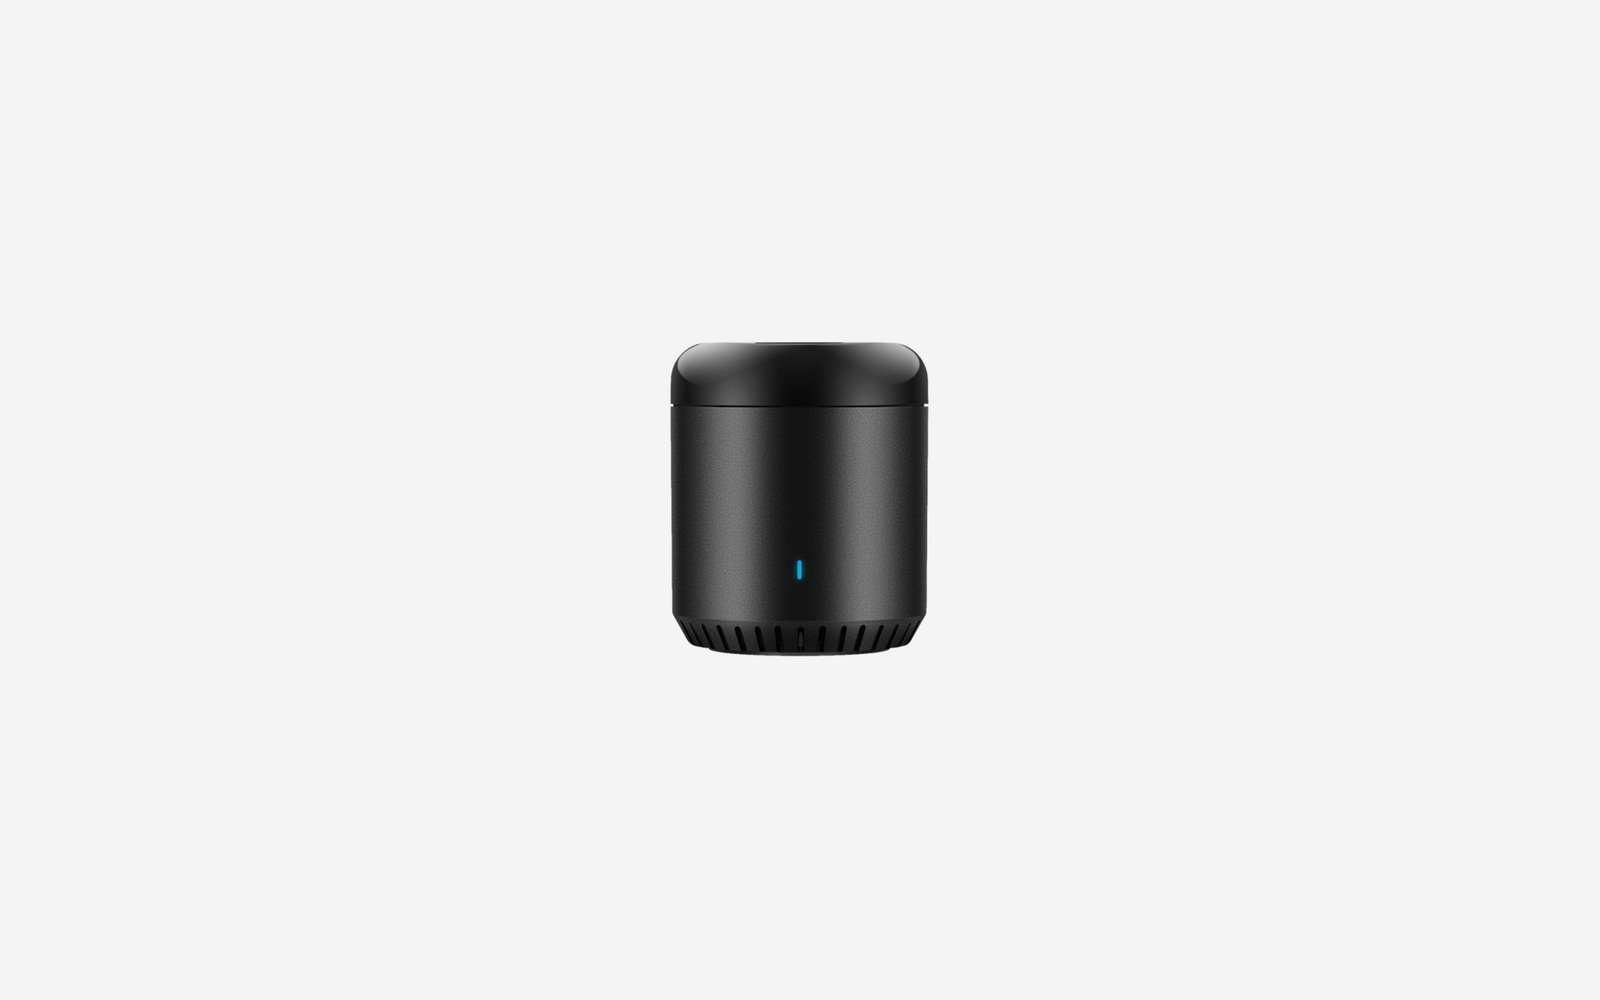
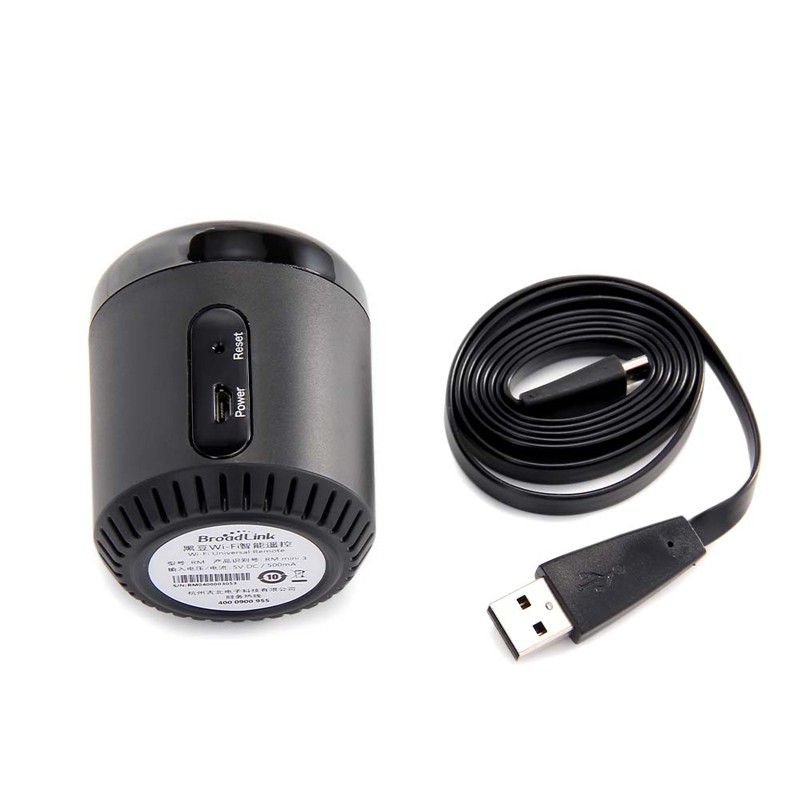
Setting up
Power the smart remote by usb cable and the phone power charge |
Use your current remote to setup IR codes for the smart remote |
|
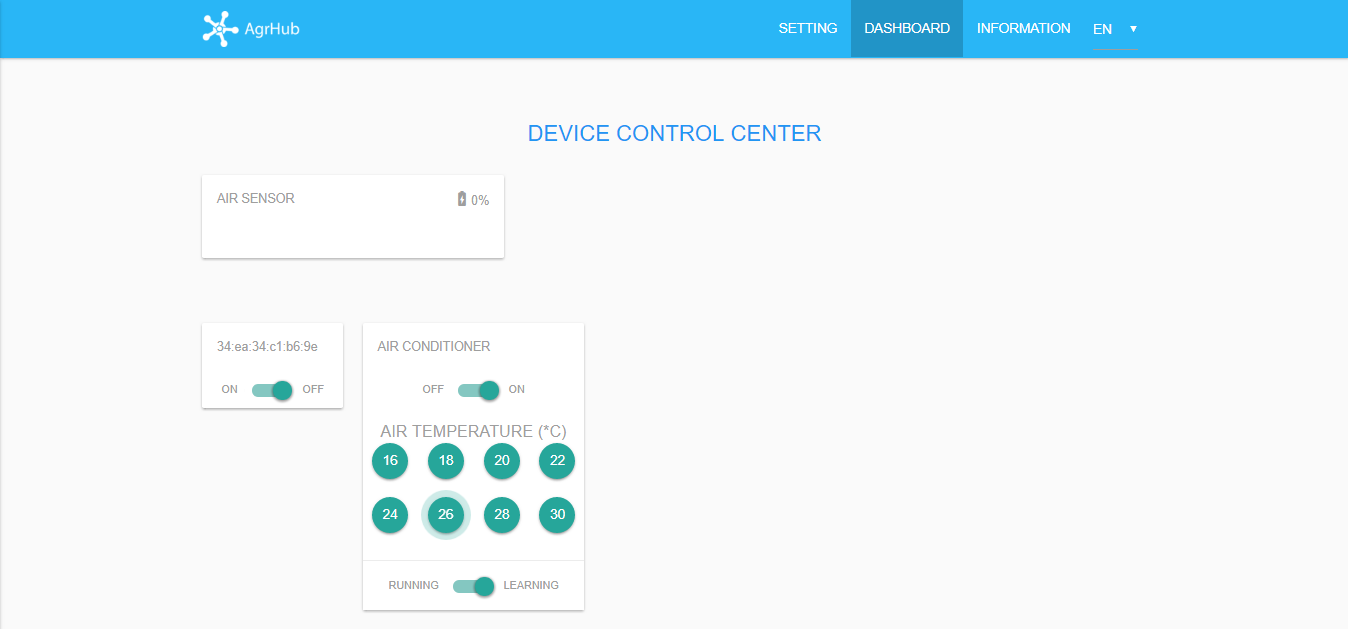
After the smart remote joins into the Sense Hub gateway, you can setup IR codes for the smart remote. |
Switch to "Learning" mode and select the function wants to teach IR code |
|
When the LED state of the smart remote is the white, you can press the key of your remote |
If the smart remote is received the IR code, the dashboard will show a message "LEARNING SUCCESSFULLY". Repeat the procedure for other functions. To verify the IR code works as expected, you can switch to "RUNNING" mode and press the key. |


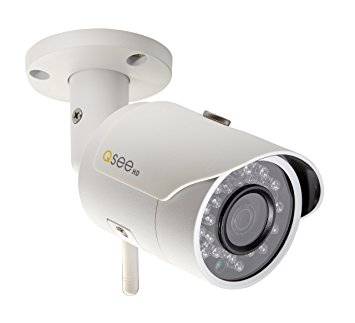
IP Camera
Specification
|
Connection |
WiFi 2.4GHz, LAN |
Power |
12V - 2A |
|
Video |
HD 960P |
|
Playback |
MicroSD Card Max 64G, Cloud |
|
Night view |
Supported |
|
Waterproof |
IP6 |
|
Working |
0% - 80% |
|
Brand |
Dahua |
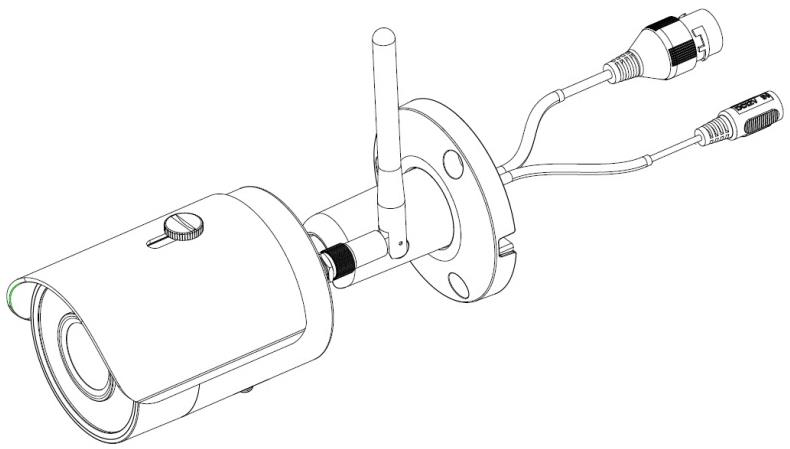
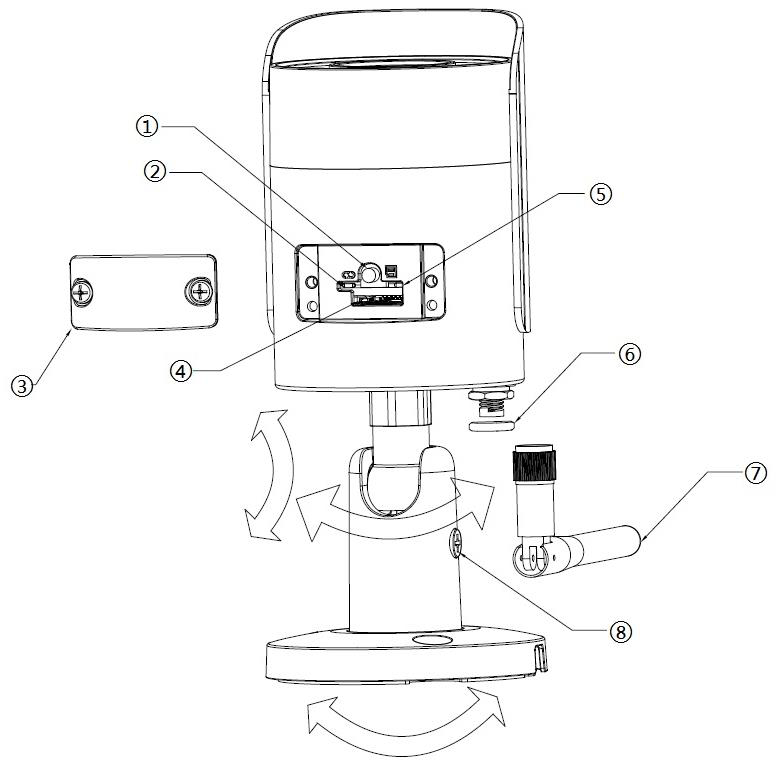
Setting up
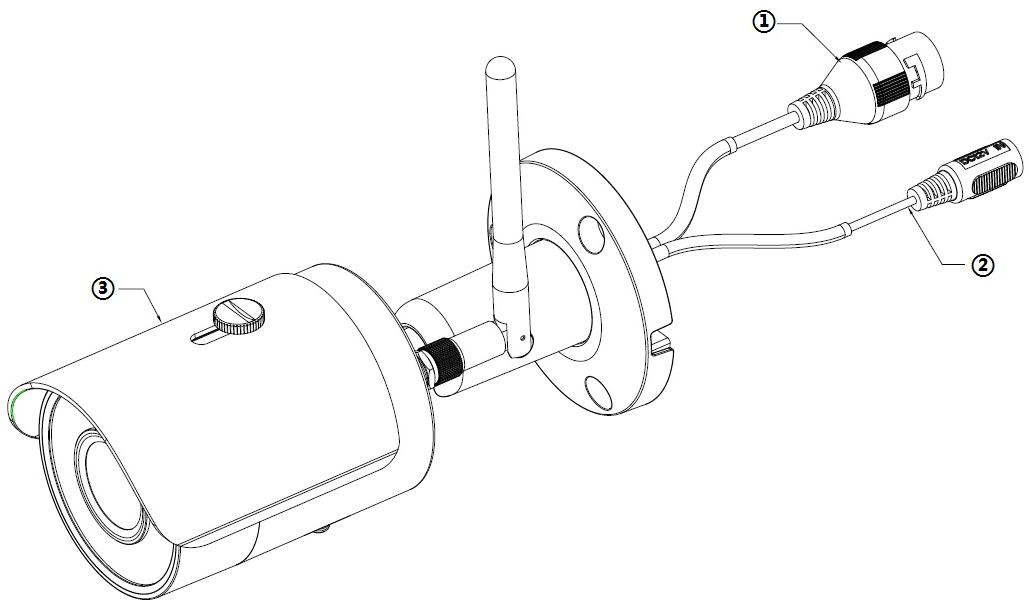
Packing List |
1. Network port 2. Power port 3. Camera |
|||||||||||||||||
1. Reset/WPS 2. Indicator light 1 3. Lower cover 4. Micro SD card slot 5. Indicator light 2 6. Waterproof ring 7. WiFi antenna 8. Locking screw |
For reset, long press for 8 seconds and then the light off; For WPS (Wi-Fi Protected Setup), one quick press.
|
|||||||||||||||||
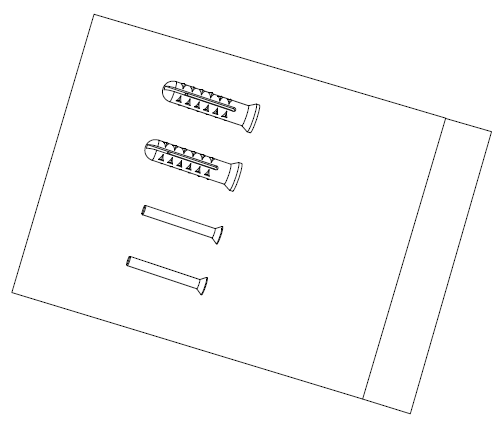
To setup camera, please follow below steps: Insert SD card into SD card slot Use screws to fix the camera on the wall Plug internet cable into network port Finally, plug power |

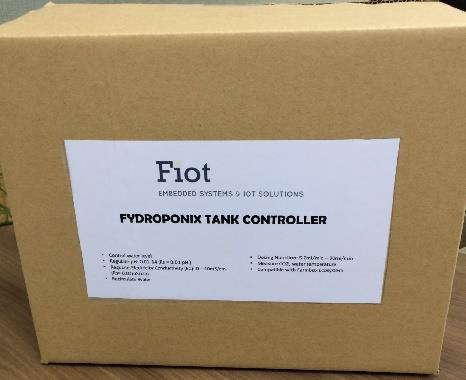
Smart hydroponic controller
Specification
|
Connection |
WiFi 2.4GHz |
Power |
220 - 240VAC |
|
Load |
2500W |
|
Calibrate time |
Wash and calibrate the sensor probes each 3 months |
|
Function |
Monitor your hydroponic tank such as pH, EC and water levelAuto dosing nutrient for your hydroponic tank for every plant and growth plantRemote control water pump, water valve in and valve out |
|
Working |
0% - 80% |
|
Brand |
Fiot |
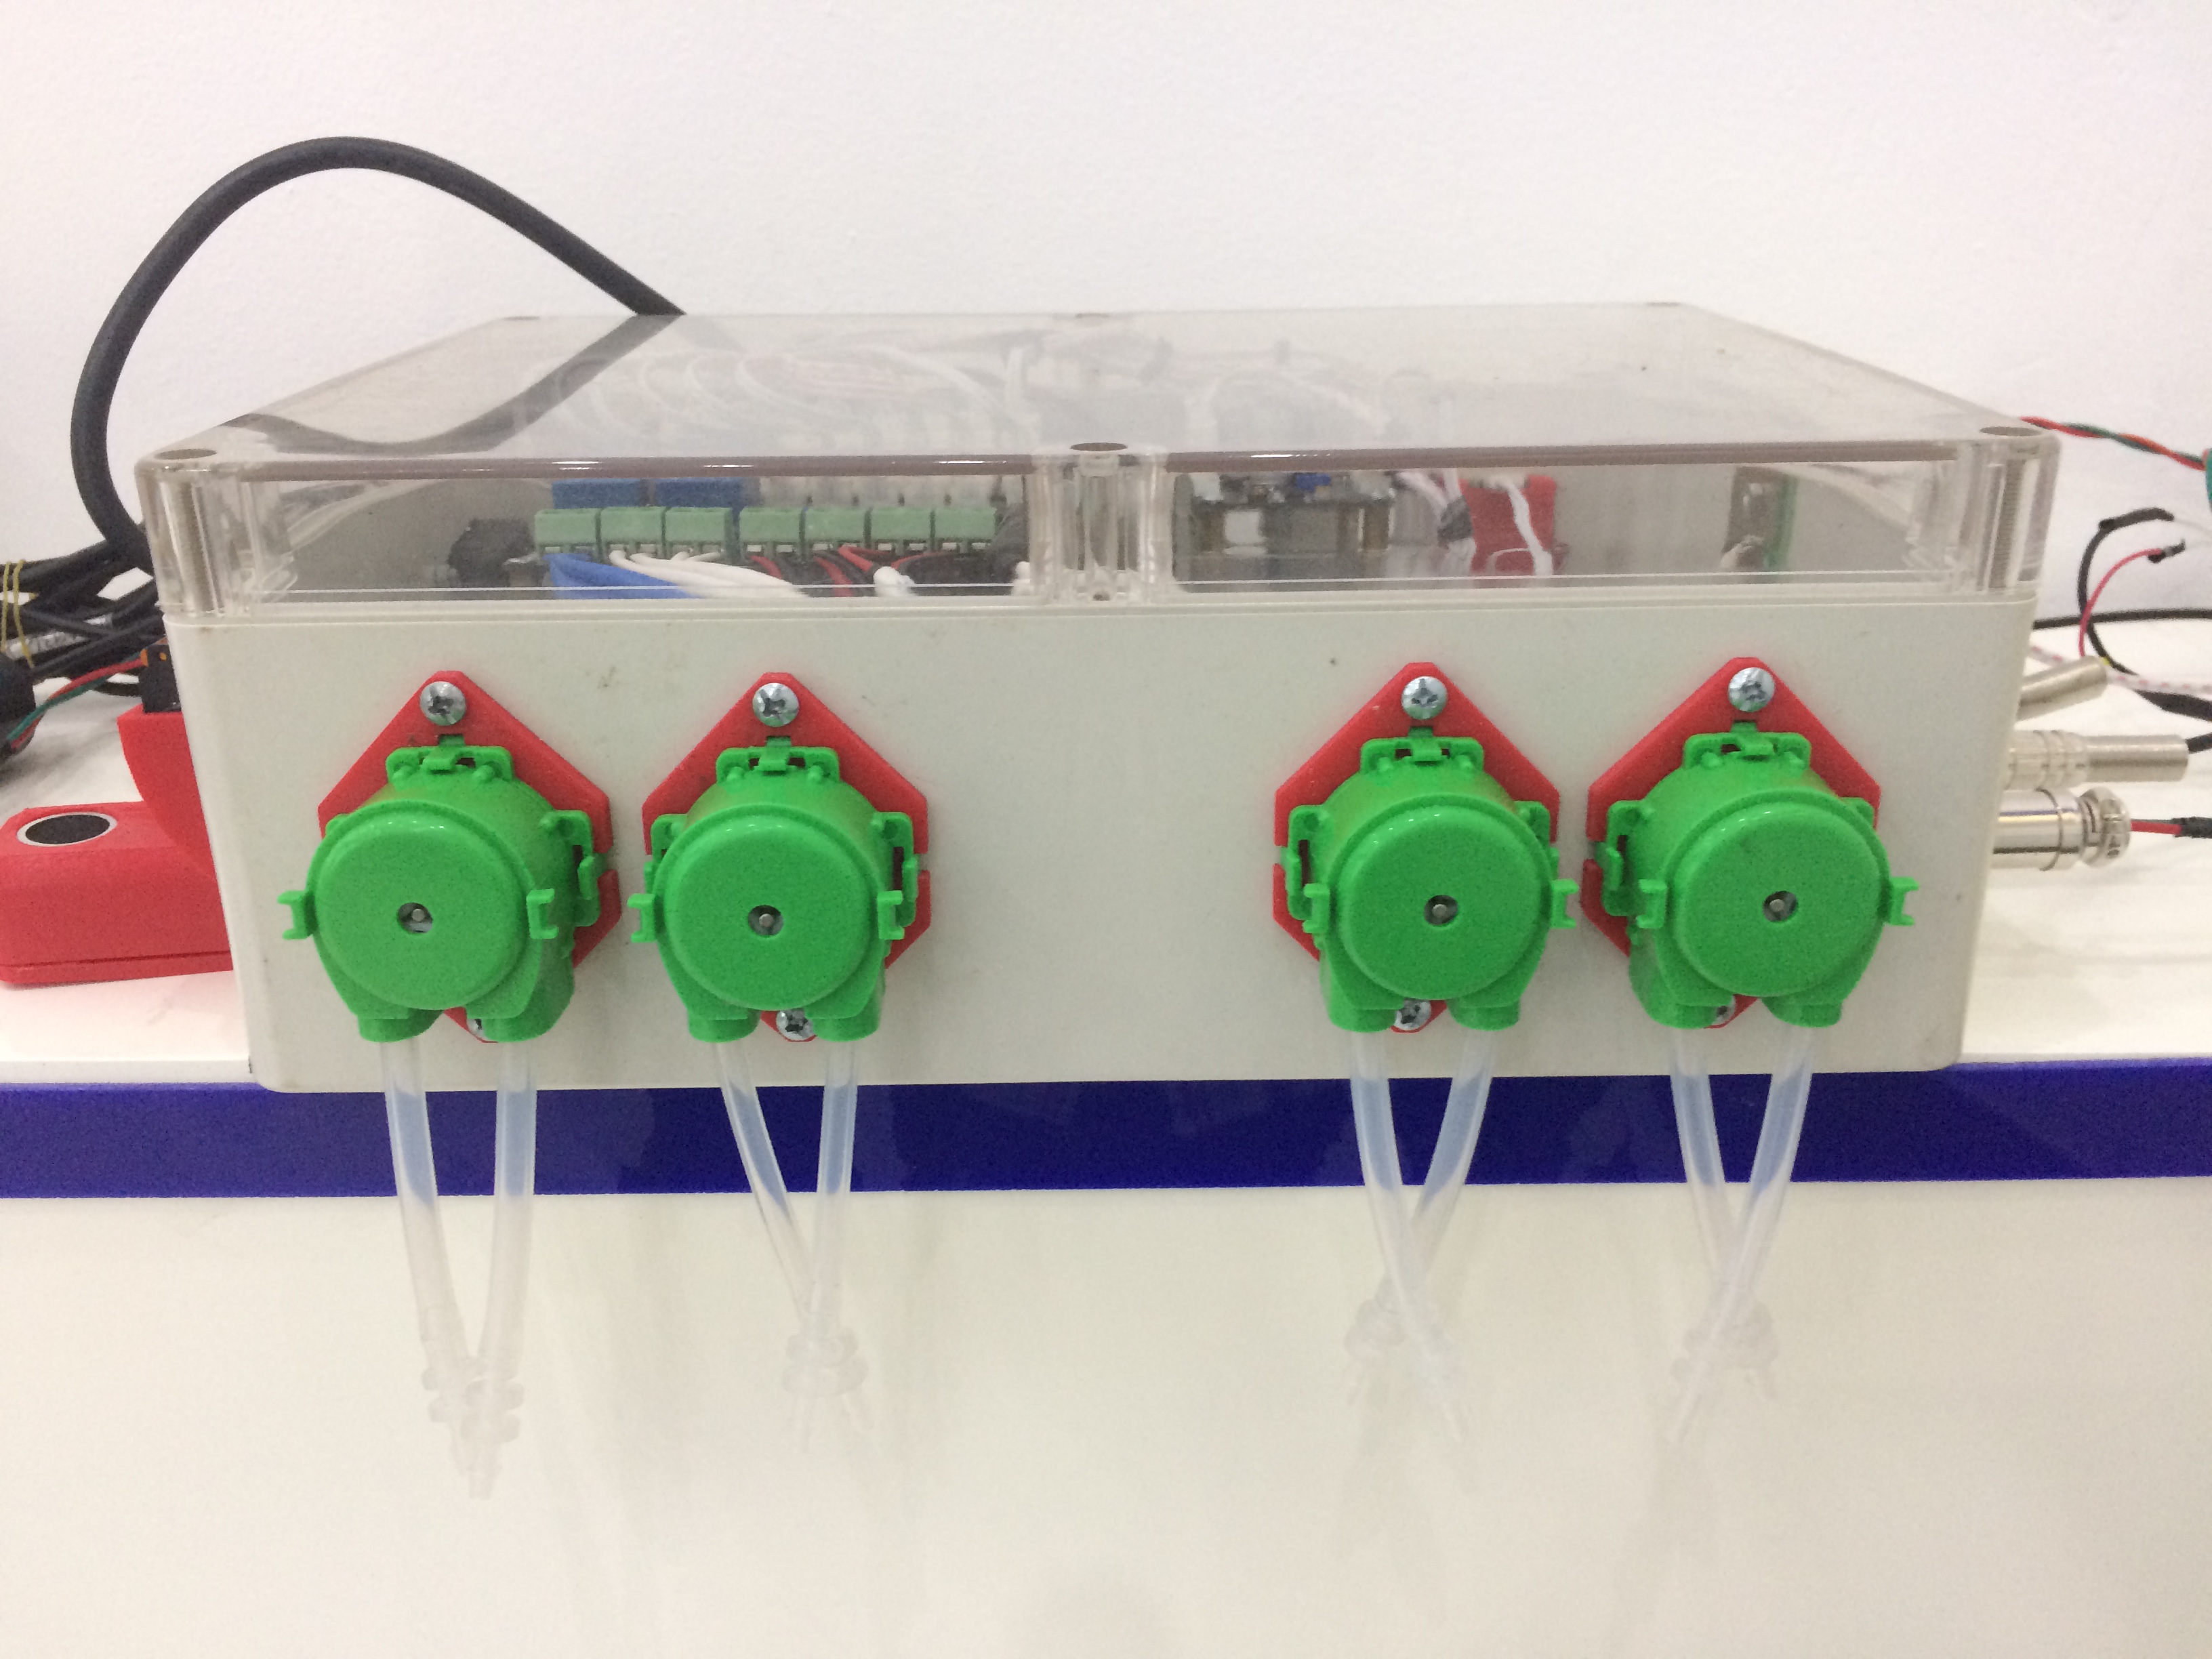
Setting up
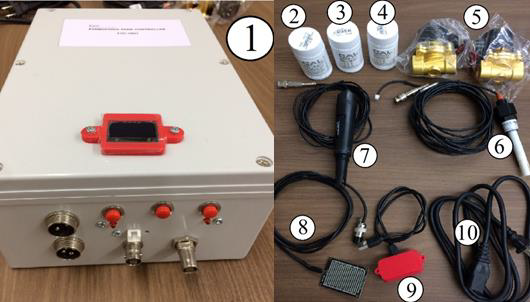
Packaging |
Components 1. Hydroponic controller 2. Calibrate solution EC 2.76 mS/cm 3. Calibrate solution pH 4.01 4. Calibrate solution pH 10.01 5. Electric valve 12V DC x2 6. EC probe 7. pH probe 8. Water leak sensor 9. Water level sensor 10. Power cable |
|
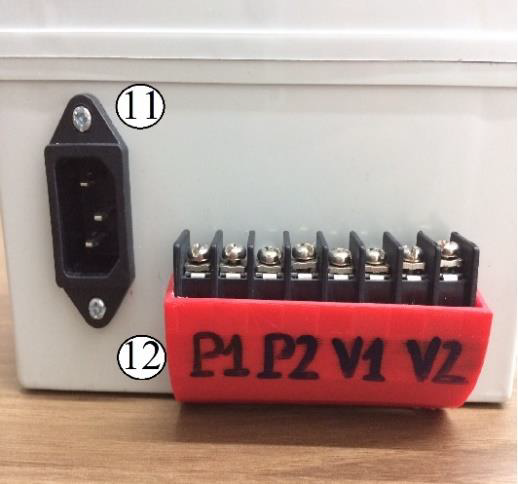
11. Power plug 12. Connectors: P1: Water pump P2: Mixing nutrient pump V1: Valve In V2: Valve Out |
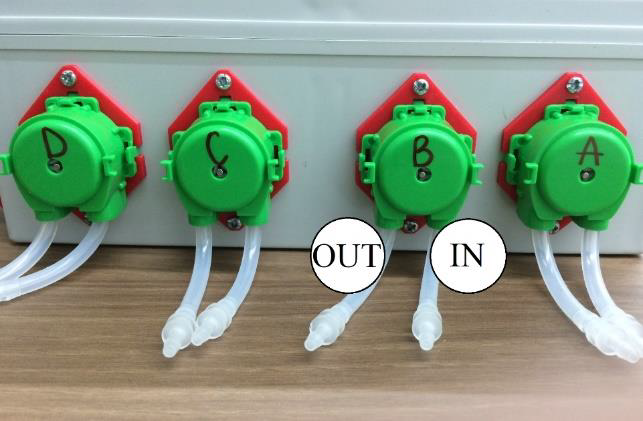
Dosing pump direction setup |
|
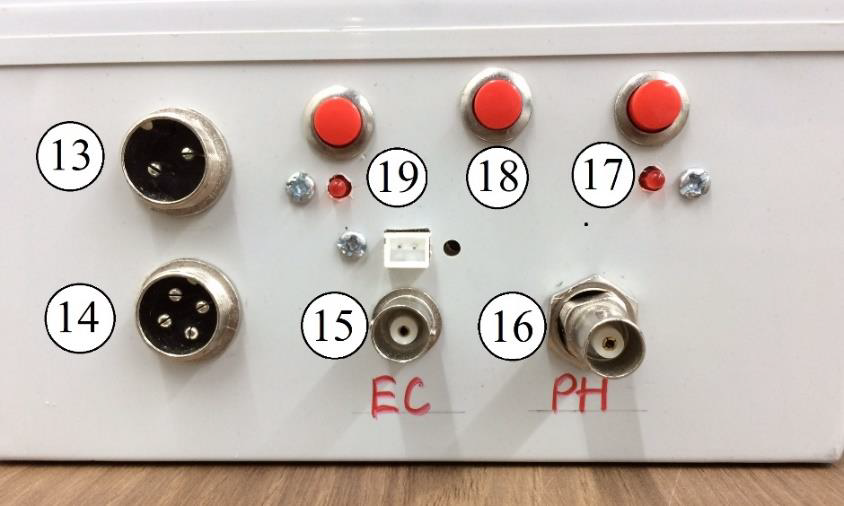
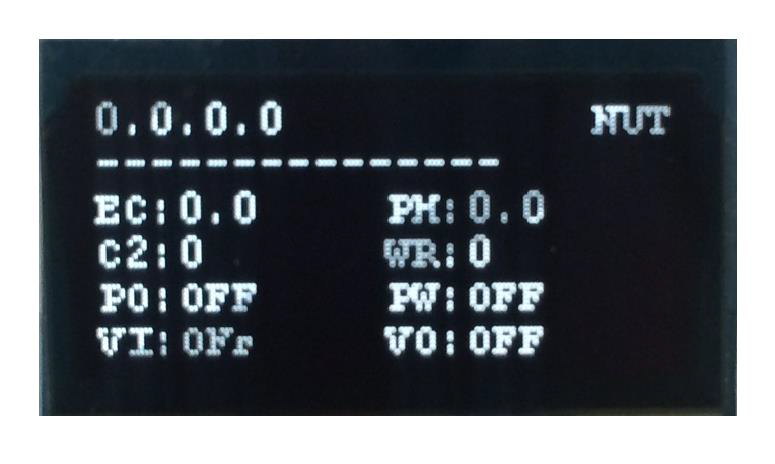
13. Water leak sensor connector 14. Water level sensor connector 15. EC probe connector 16. pH probe connector 17. pH calibrate button 18. Reset button 19. EC calibrate button |
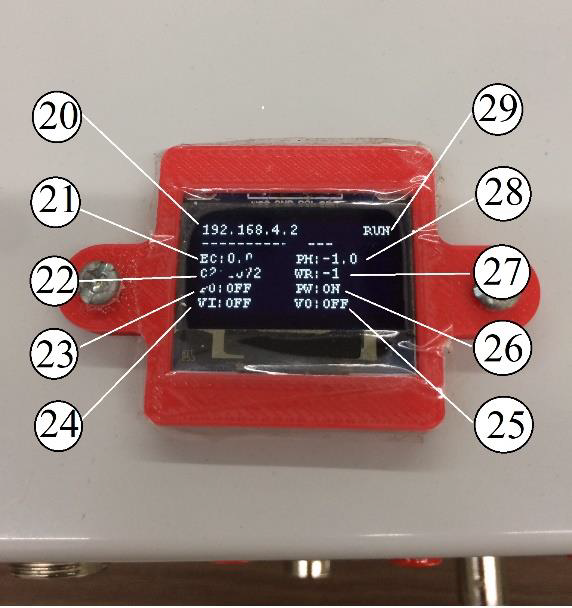
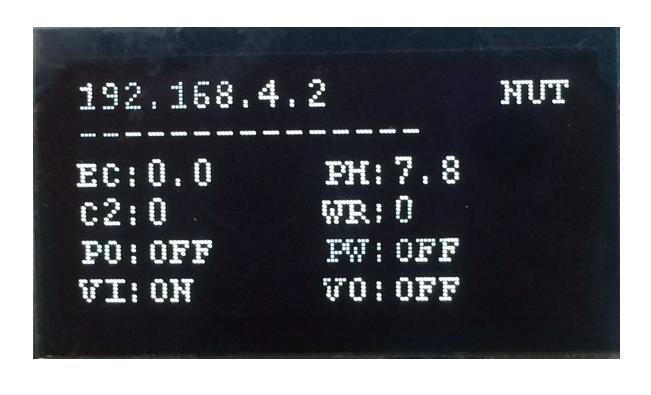
20. Local IP address 21. EC value 22. CO2 value 23. Mixing pump state 24. Valve in state 25. Valve out state 26. Water pump state 27. Water level value 28. pH value 29. Working Mode: RUN: running IDLE: rest time WASH: washing NUT: calibrating nutrient |
|
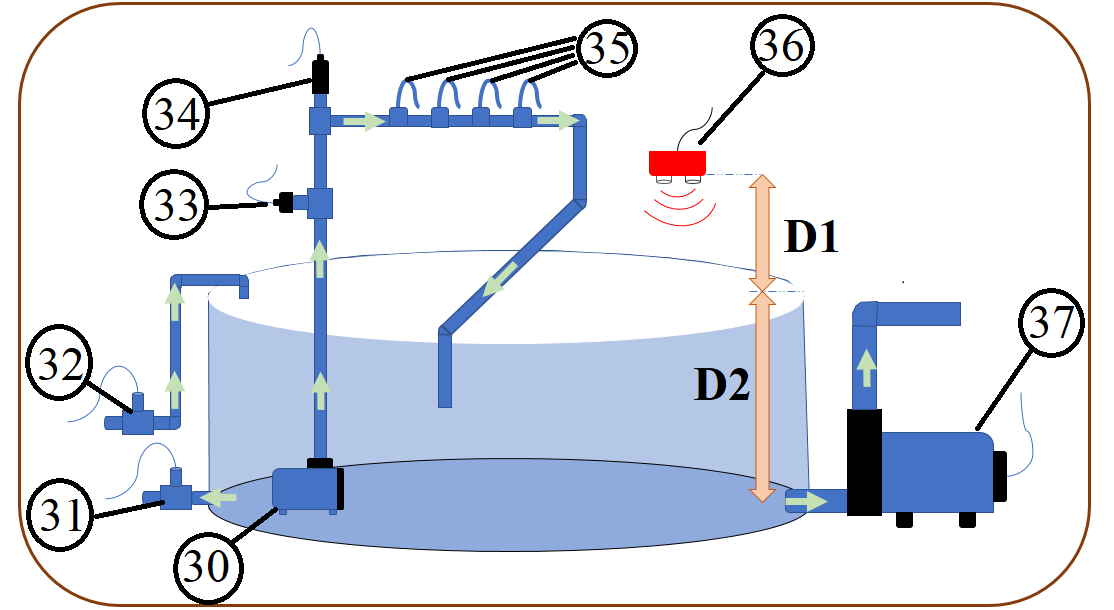
Setup system 30. Hydroponic controller 31. Valve out 32. Valve in 33. EC probe 34. pH probe 35. Dosing tubes 36. Water level sensor 37. Water pump |
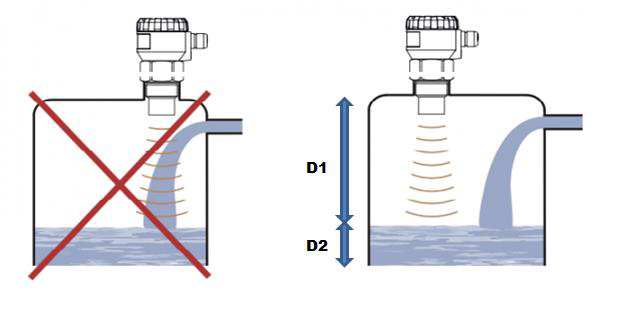
Water level setup SHOULD: Place at no obstacle object o D1 distance between sensor and water o D2 Height of water o Note: D1 + D2 <= 450cm |
|
Plug power and hydroponic controller is started |
Hydroponic controller will auto connect with Sense Hub gateway |
|
Hydroponic controller is connected Sense Hub and read data |
Gateway
Specification
|
Connection |
WiFi 2.4GHz, BLE 4.2 |
Power |
110 - 240VAC EU |
|
WiFi distance |
30m |
|
BLE distance |
50m |
|
Life time |
Over 10 years |
|
Function |
Smart farming gateway removes the gap between farmer and technologies. SENSE HUB combines smart sensors and smart controllers from many partners to work together by simplest way. |
|
Working |
0% - 80% |
|
Brand |
AGRHUB |
Setting up
Plug gateway into the socket. The LED light indicates the gateway state. RED - not connect; BLUE - configuration mode and GREEN - running mode |
Press and hold the smart button in 3s to switch the gateway to configuration mode |
|
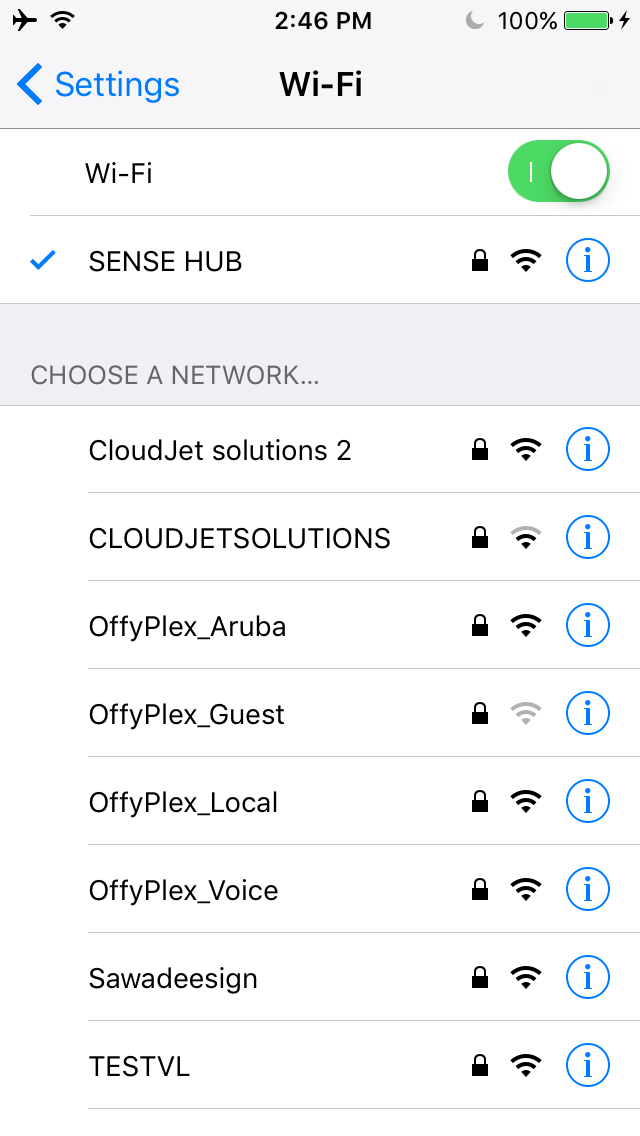
Connect to WiFi "SENSE HUB" with default password "12345678" |
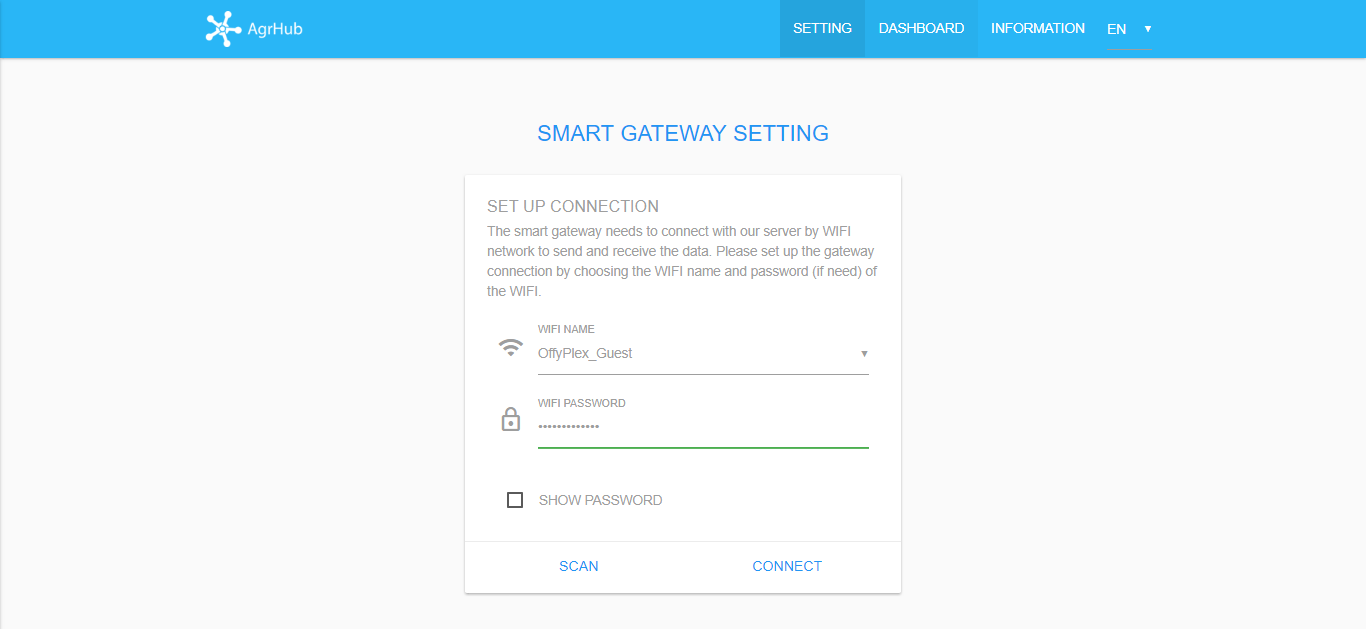
Open the dashboard page with URL "http://192.168.4.1" by browser such as Chrome, Safari, Firefox ... |
|
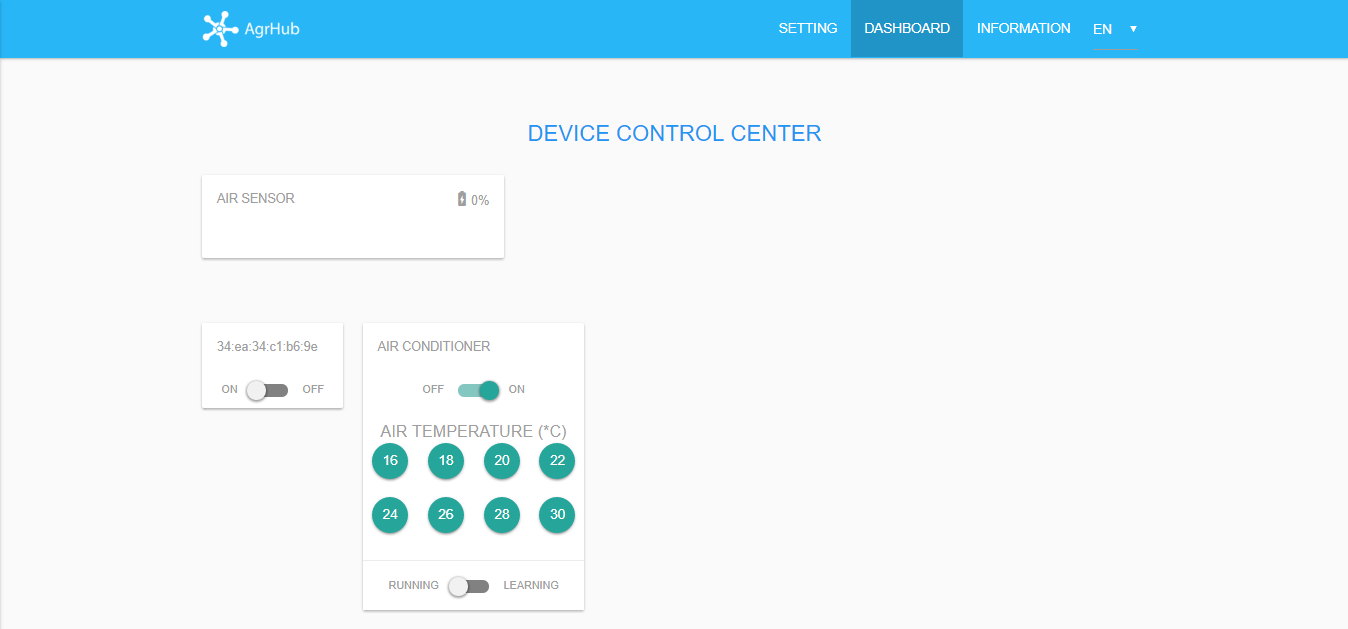
Navigate to "DASHBOARD" tab to configure WiFi device such as smart plug, smart remote, hydroponic nutrient controller ... |
If anything works well, you can navigate to "SETTING" tab to setup WiFi connection for the gateway by select "WiFi Name" and "WiFi Password". Choose "CONNECT" to test your password. |
|
If WiFi password is right, the dashboard will show message "CONNECT SUCCESSFULLY" and you can choose "REBOOT GATEWAY" to switch the gateway to running mode. If not, please check your password and repeat. |
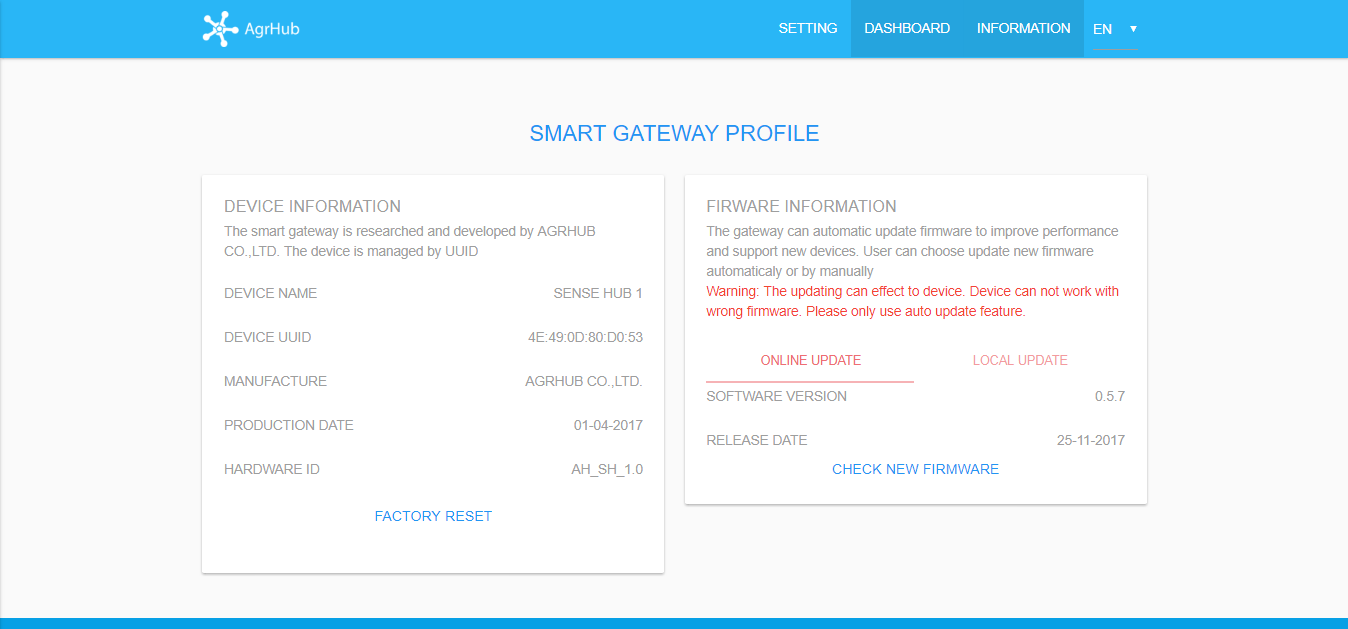
If you want to know more information about gateway, you can navigate to "INFORMATION" tab. |


- The Setup Farm Profile
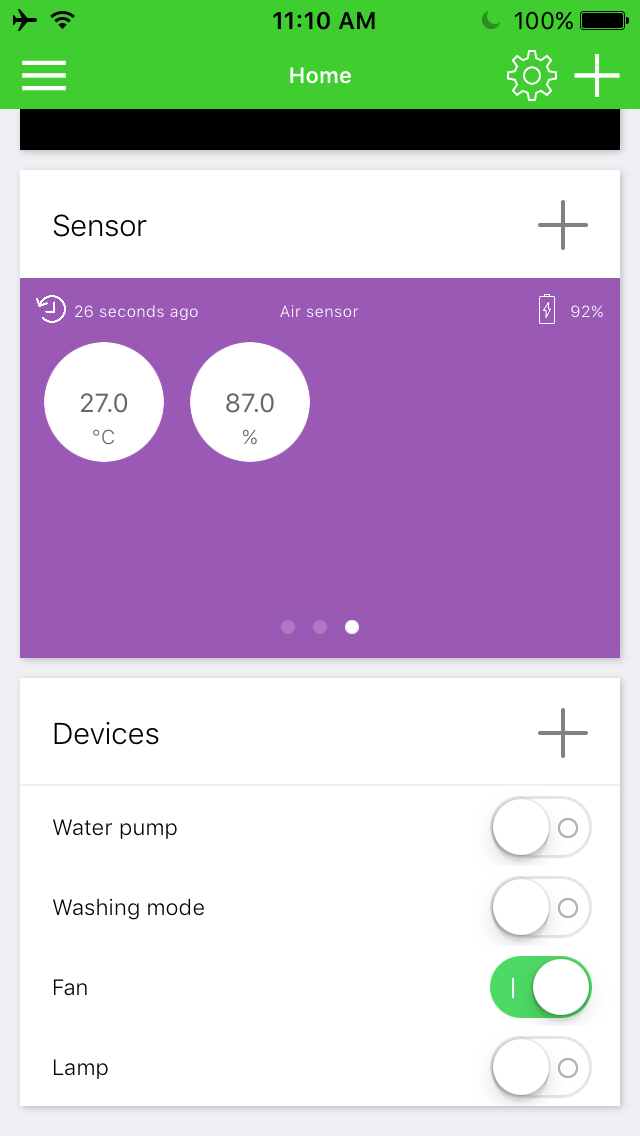
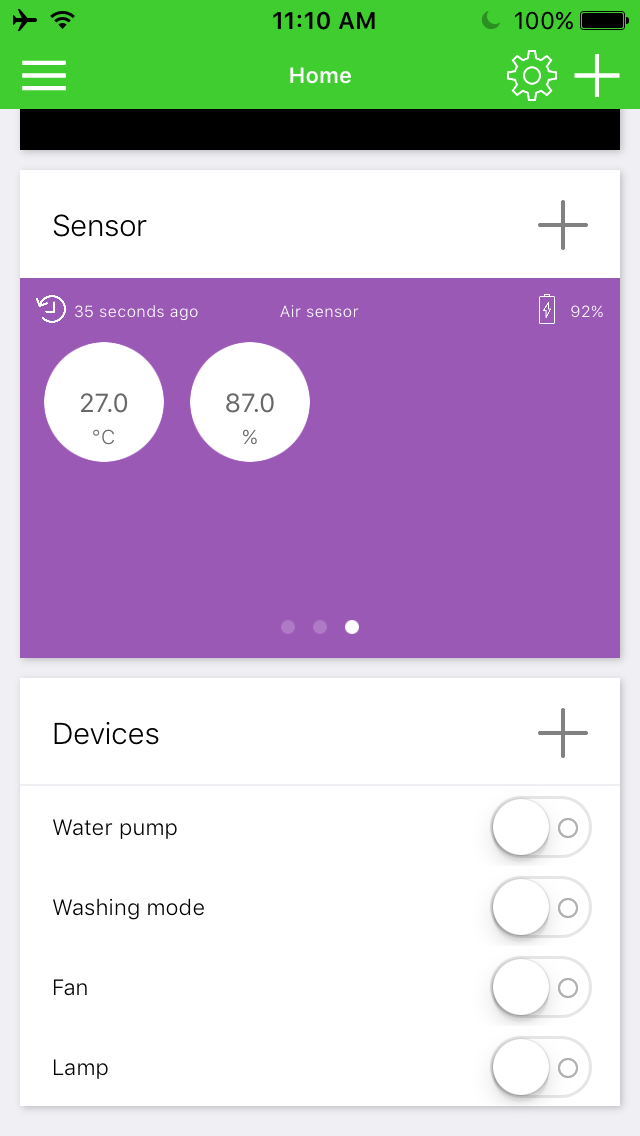
With FARMBOX, you can easy control the devices anywhere and anytime. We try binging the modern technologies for farmer in the simplest way. FARMBOX can meet any your requirement. FARMBOX supports up to 4 controlling modes and you can easy to change the mode.


Manual mode
Manual mode is default for a new farm. Farmer is a main actor of farm. Based on their experiences, they decide turning on or turning off device. To protect the system, the device will be automatic turned off if farmer doesn't have any action. They can re-turn on if needing.
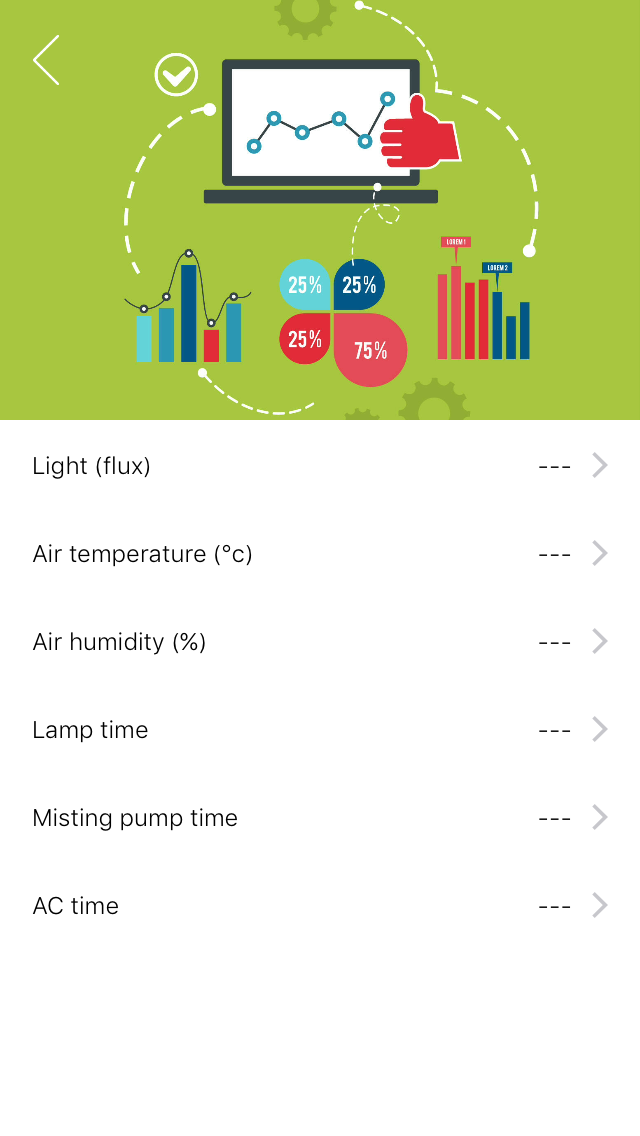
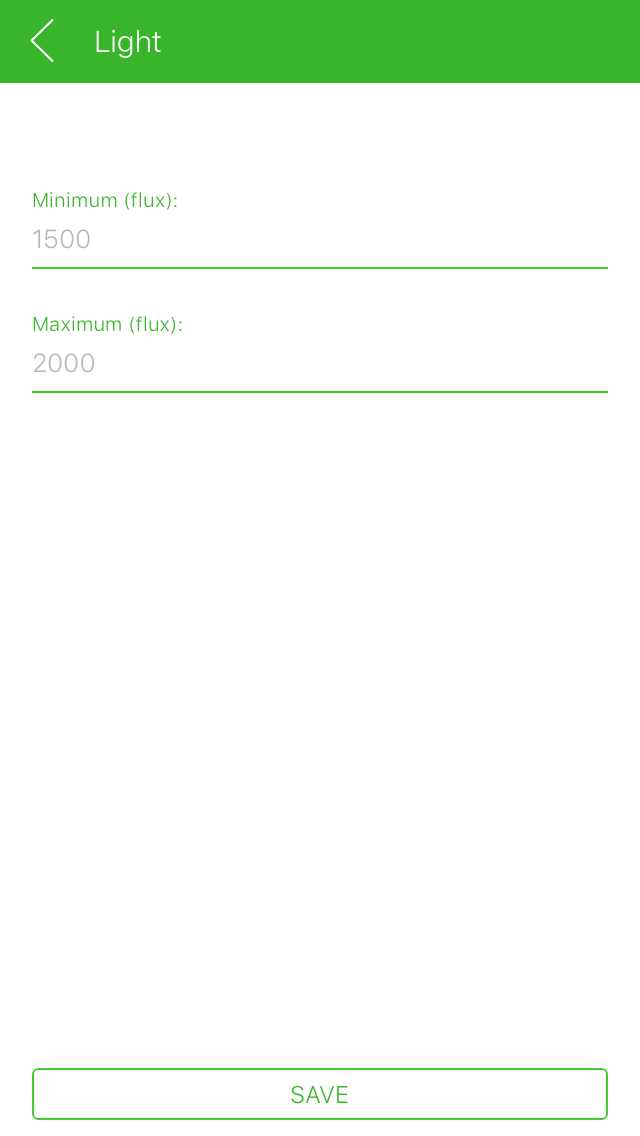
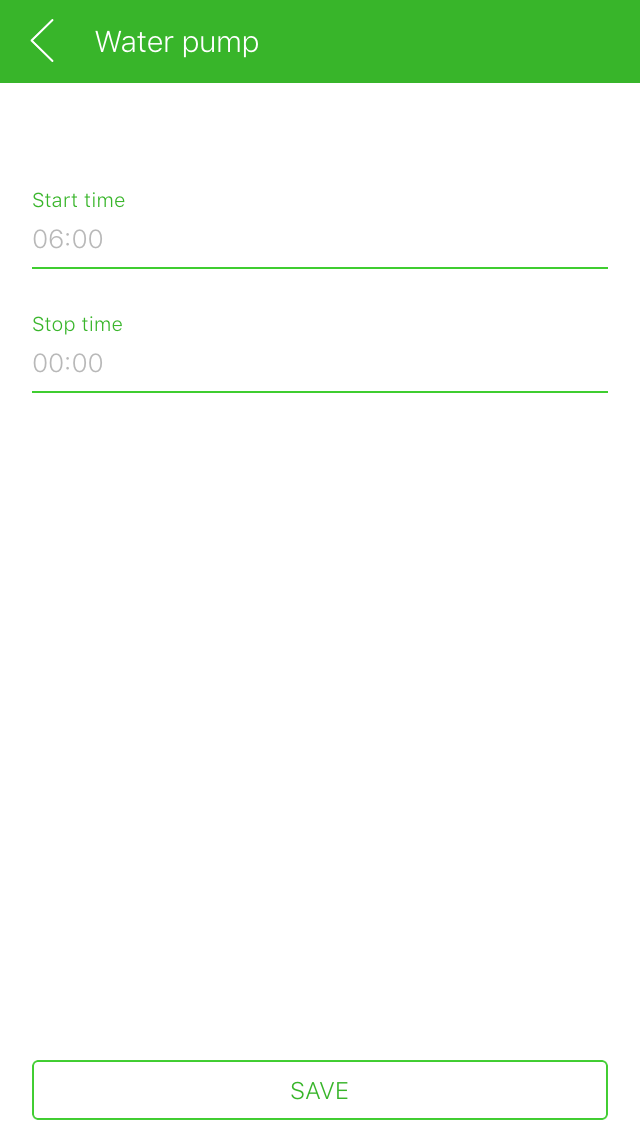
Threshold mode
In the setting profile page, you can edit the threshold for each condition and on time range for each device on your farm
Notes:
Setting |
Description |
Unit |
Range |
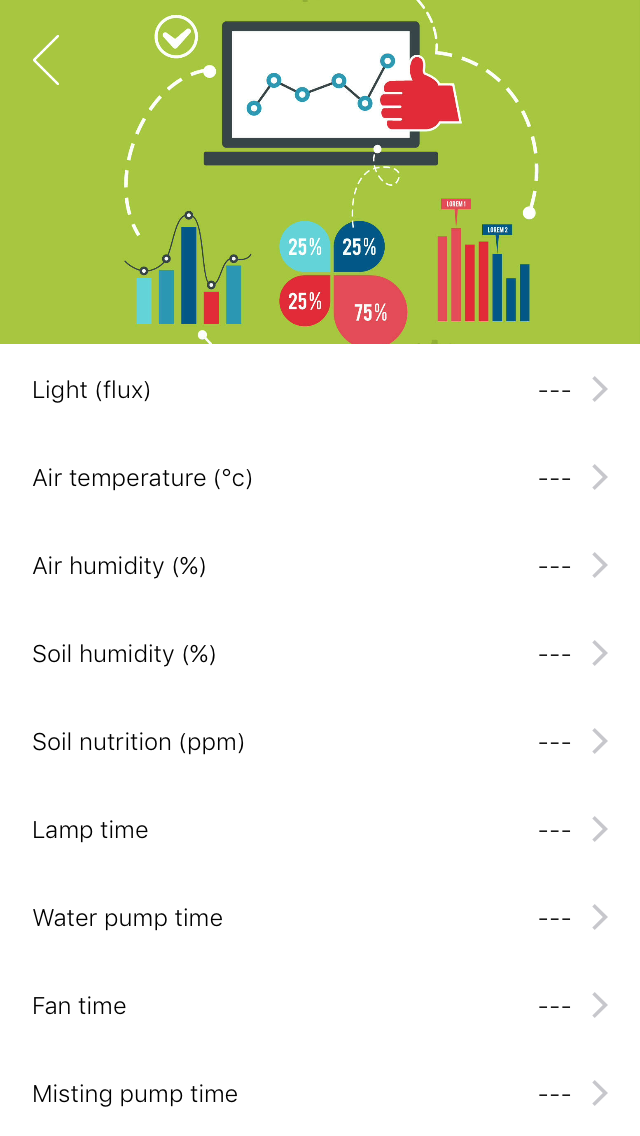
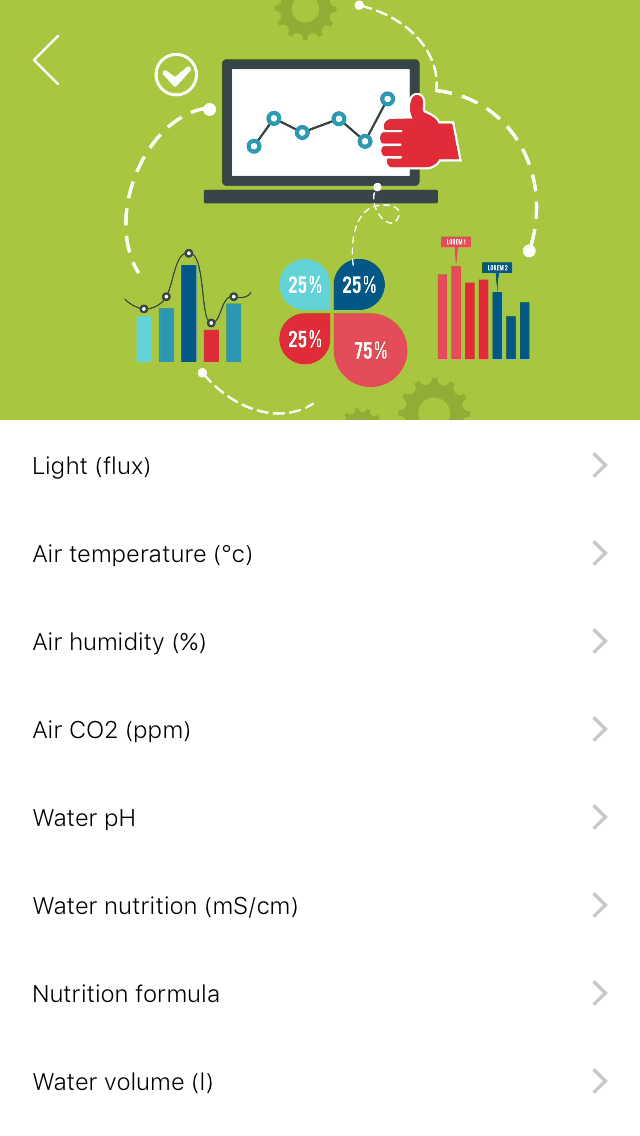
Light |
the Ambient Light Sensing (ALS) devices approximate the human eye response to light under a variety of lighting conditions. The devices have a wide range of performance allowing accurate ALS measurements in lighting environments ranging from low-light to bright sunlight up to 220K flux |
FLUX |
0 - 100,000 LUX |
Air temperature |
Air temperature is a measure of how hot or cold the air is. Air temperature affects the growth and reproduction of plants and animals, with warmer temperatures promoting biological growth. Air temperature also affects nearly all other weather parameters |
°C |
0 - 56°C |
Air humidity |
Humidity, the amount of water vapour in the air. It is the most variable characteristic of the atmosphere and constitutes a major factor in climate and weather |
% |
0 - 100% |
Soil humidity |
Soil moisture is the volumetric water content in soil. |
% |
0 - 100% |
Soil nutrition |
Soil electrical conductivity (EC) is a measurement that correlates with soil properties that affect crop productivity, including soil texture, cation exchange capacity (CEC), drainage conditions, organic matter level, salinity, and subsoil characteristics. |
PPM |
0 - 20,000 PPM |
Water pH |
The pH level of water measures how acidic it is (pH stands for potential hydrogen, referring to how much hydrogen is mixed with the water.) 7 is a balanced pH for water. Anything below 7 indicates the water is acidic, and if it’s above 7 it is alkaline |
-- |
0.00 - 14.00 |
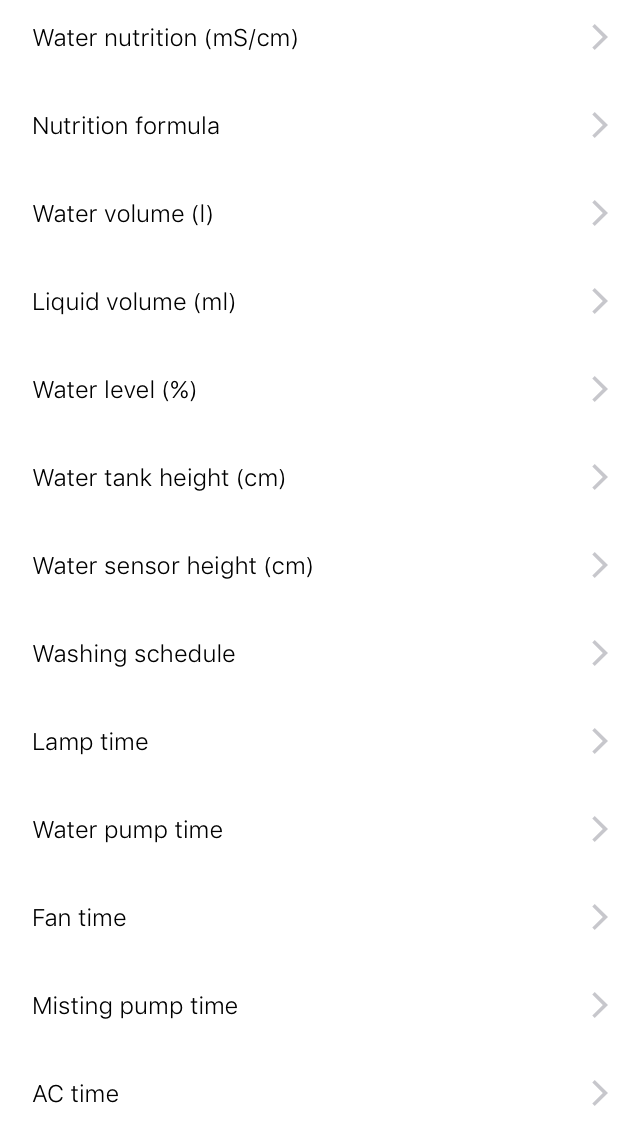
Water nutrition |
An EC meter measures the potential for an electrical current to be transported through water. This is known as molar conductivity (electrolytic conductivity) and is measured in siemens (S). Electrons are able to flow through the water from one set of electrodes to another not because of the water molecules themselves, but because of the ions dissolved in the water. It is these ions that transport the electrons. |
mS/cm |
0 - 20 mS/cm |
Water level |
Percent of water in the hydroponic tank |
% |
0 - 100% |
Nutrition formula |
Percent of nutrient elements in a hydroponic tank |
% |
A + B + C = 100% |
Water volume |
Water volume of the hydroponic tank |
L |
|
Liquid volume |
Water volume of the nutrient container |
ML |
|
Water tank height |
Measure height of the hydroponic tank from the bottom to top |
CM |
20 - 300 CM |
Water sensor height |
Measure the distance between the water level sensor to the top of the hydroponic tank |
CM |
20 - 100 CM |
Washing schedule |
Schedule time for washing the hydroponic tank. The water in the tank will be removed by valve out and added new water by valve in. After that, based on the nutrition formula, the hydroponic controller will calibrate the hydroponic nutrient by the dosing pumps |
-- |
A time in a week |
Lamp time |
Time to allow turning on the lamp in your farm |
-- |
On hour - Off hour |
Water pump time |
Time to allow turning on the water pump in your farm |
-- |
On hour - Off hour |
Misting pump time |
Time to allow turning on the misting pump in your farm |
-- |
On hour - Off hour |
Fan time |
Time to allow turning on the fan in your farm |
-- |
On hour - Off hour |
CO2 valve time |
Time to allow turning on the CO2 valve in your farm |
-- |
On hour - Off hour |
AC time |
Time to allow turning on the air conditioner in your farm |
-- |
On hour - Off hour |
Automation Mode
We are building a plant scientist database. For each plant, we define the good profile for each plant growing. Based on the profiles, real-time sensor data and local weather forecast, our server will remote control your devices to make a good climate for your plant. Default, the farm will apply this mode if the plant has detail the growing profiles. If not, the farm will run in manual mode.
Hybrid Mode
The hybrid mode is combine of all above modes. The climate will be controlled based on the default growing profile, your profile setting and user actions
- The Setup Farm Visibility


- The Setup Device Visibility
Created with the Personal Edition of HelpNDoc: Benefits of a Help Authoring Tool